
Autoship B2B for Shopify - Install & Launch
When you download the Autoship app from the Shopify marketplace and open the Autoship app in your Shopify admin, you will be brought through an onboarding flow called "Autoship in 5". This onboarding flow will check that your pre-requisites have been met so that you can fly through setup.
As a re-cap on pre-requisites, it means you have a b2b shopify store that can support a check out. More specifically, you have the following setup up prior to setting up Autoship for B2B:
Your Shopify B2B store has a company (customer), with a contact that can can purchase from it, using a catalog that they are assigned to via their company location. Lastly the company has assigned payment terms and if you expect to charge a credit card or process via ACH, your payment processing (or ACH) has been setup and tested.
The onboarding will have you select a product to apply your Autoship frequency settings to first.
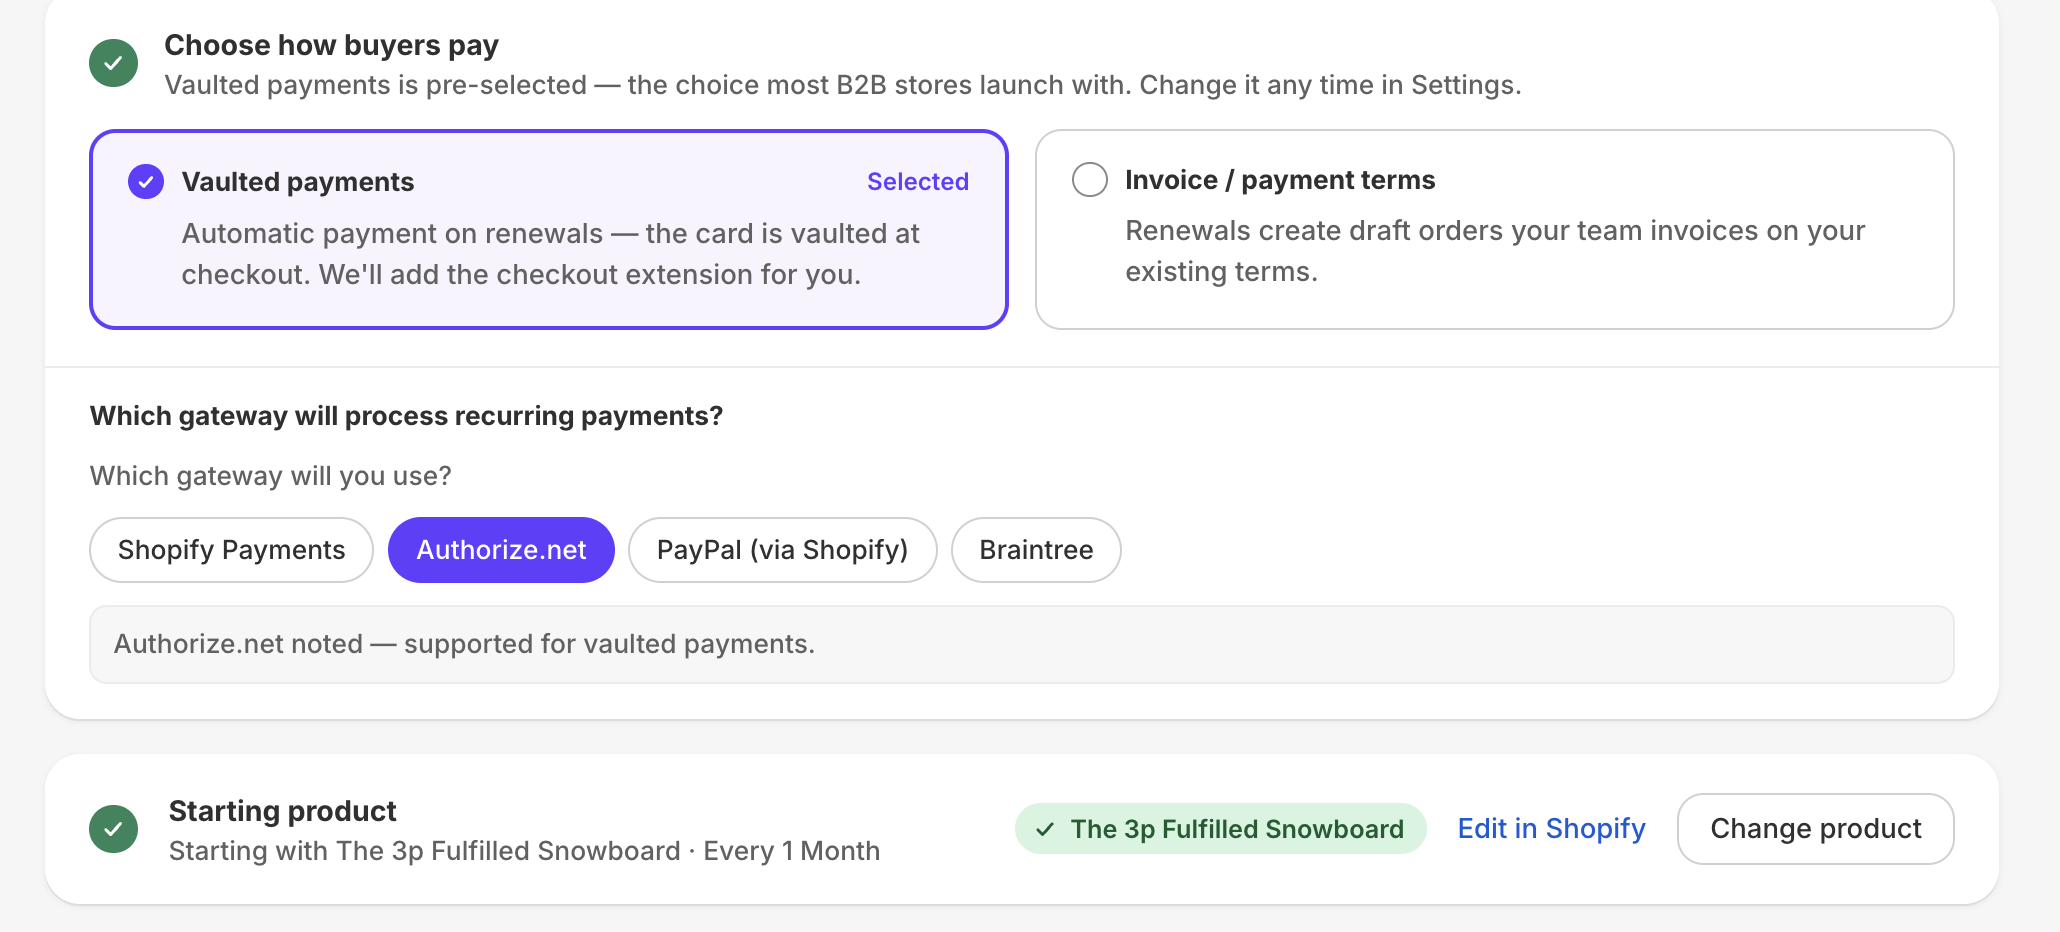
When you select a sample product, you are going to select or accept some frequency options. This can be changed later in the "metafields and objects" part of your settings. After you select a sample product to use as your test subscription order, you can add the b2b widget on the product page. For this, you will go into your theme editor, open your product page and insert a widget called "b2b autoship."
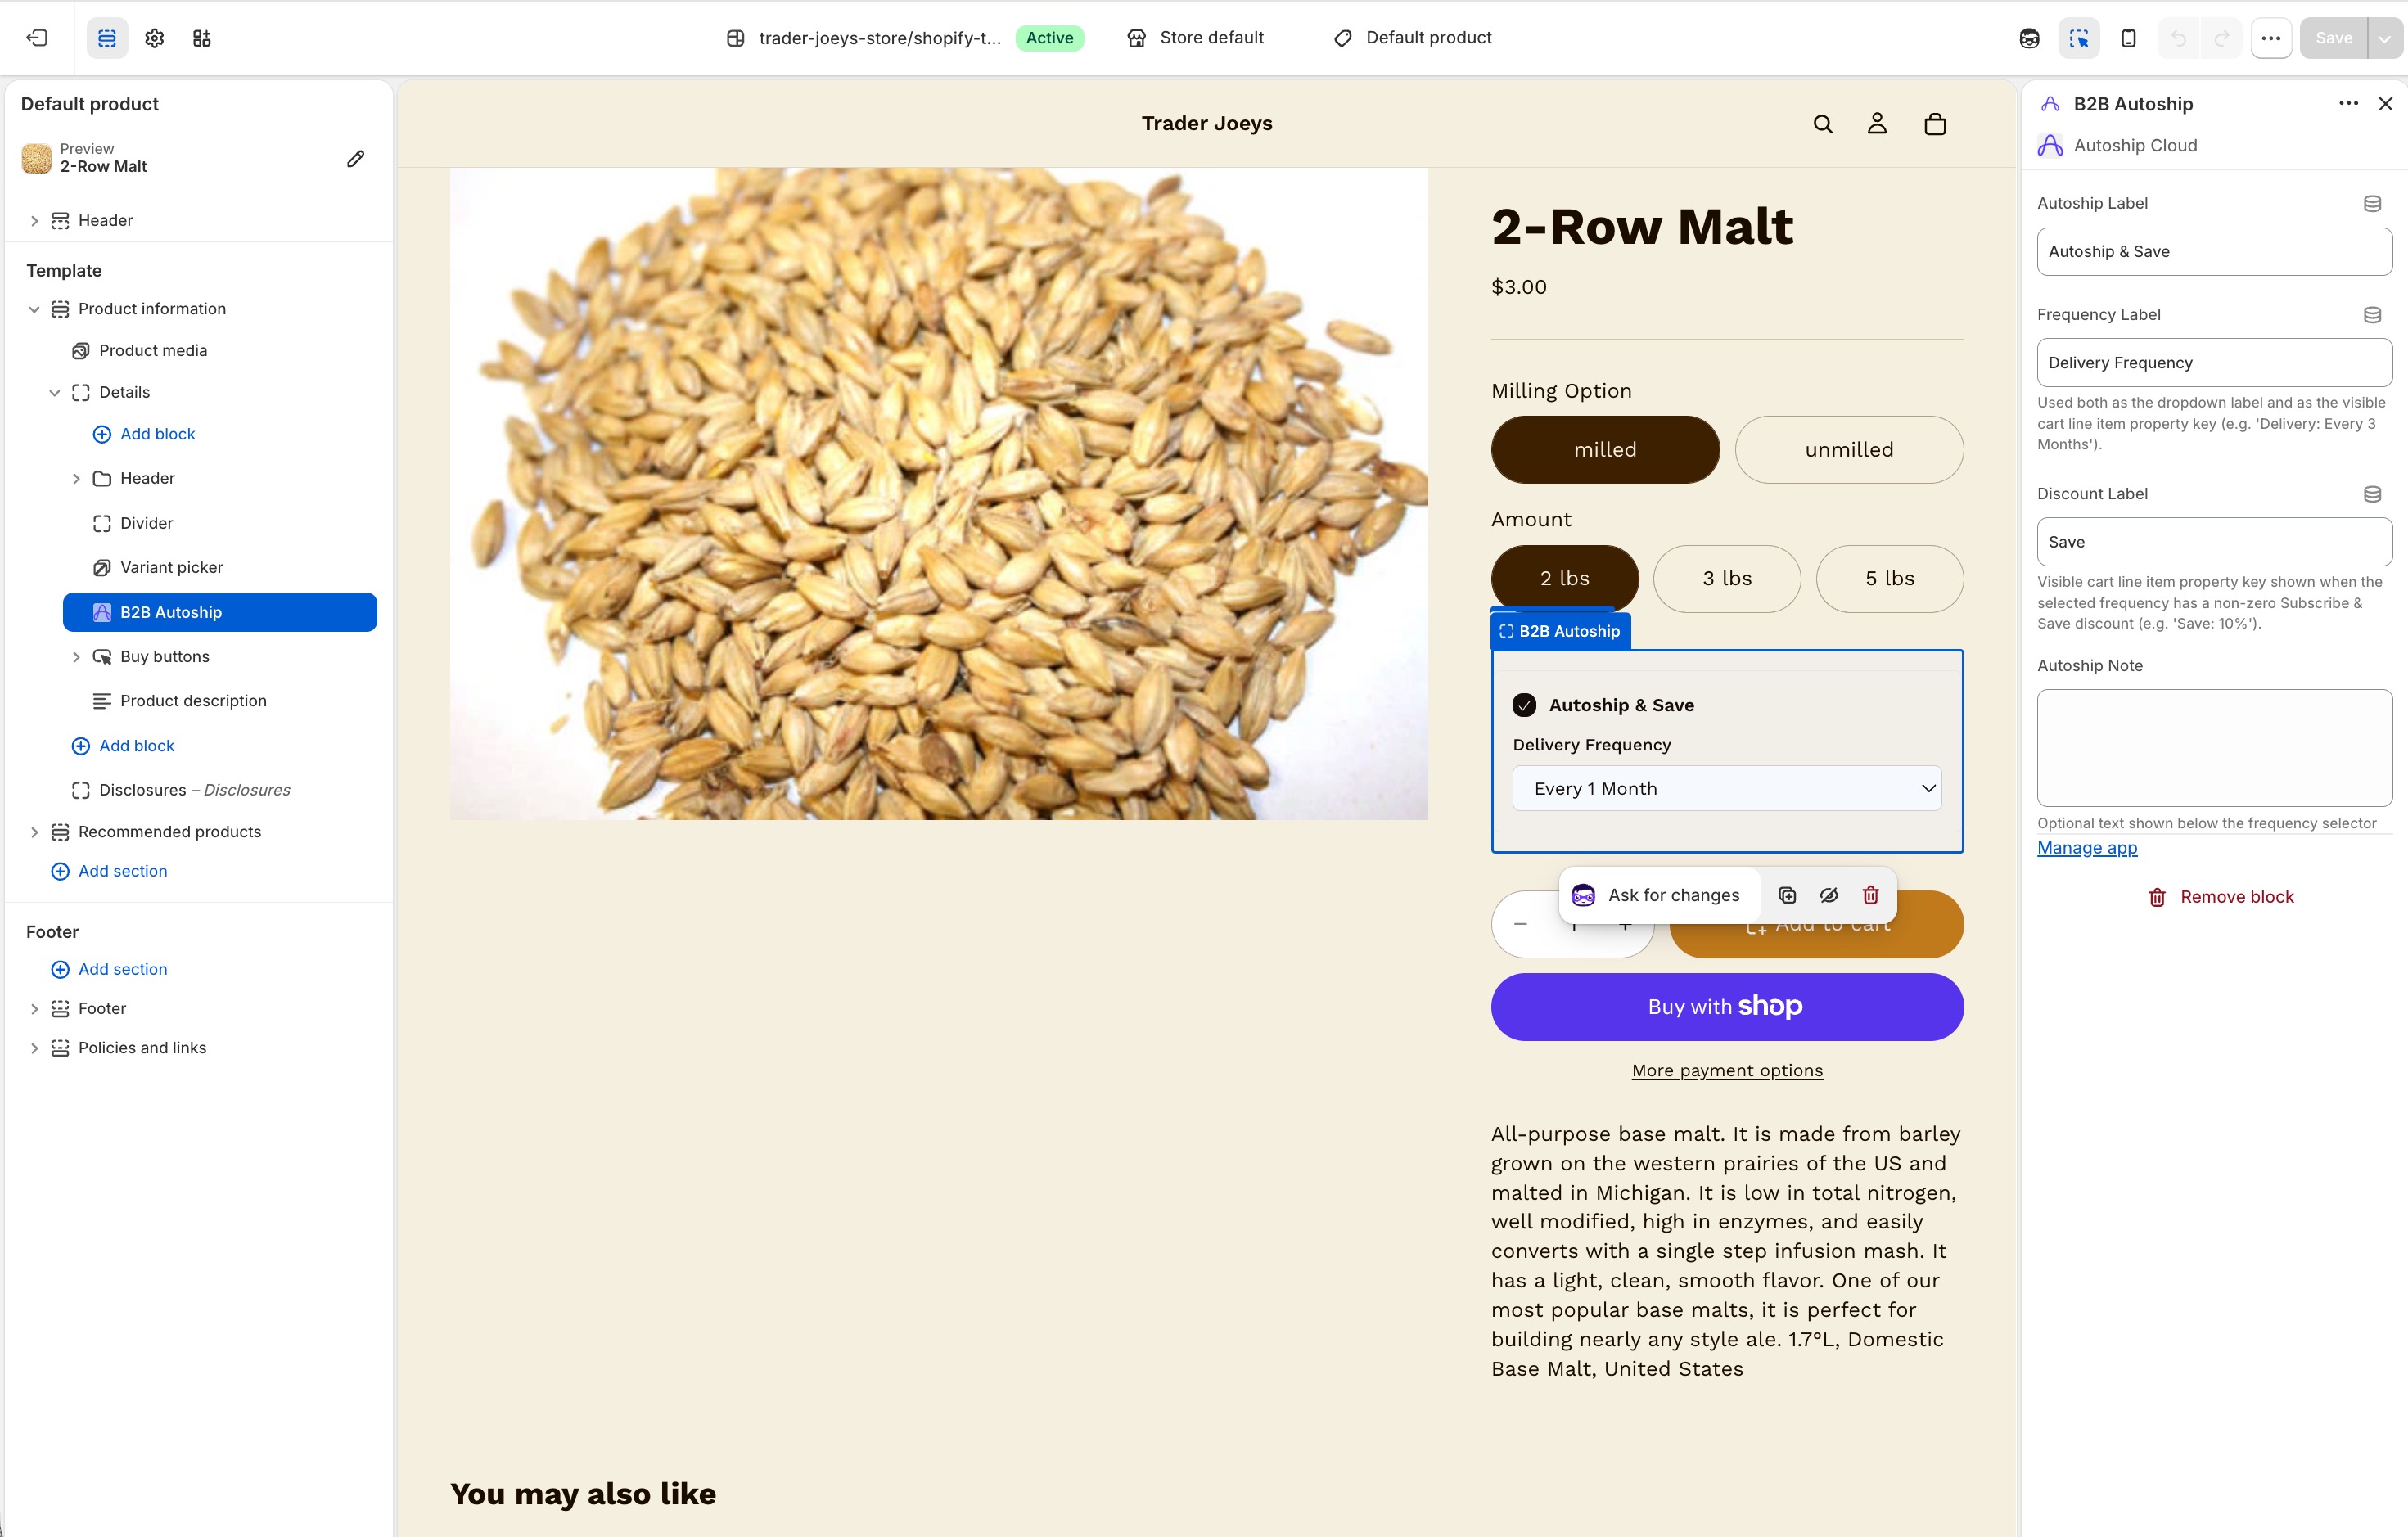
This app block is liquid and can be easily customized with css. Next, you'll add a page for the subscription portal, add the portal widget, and link it in your home page navigation.
There is a helpful gif that goes through the steps in the onboarding flow. You can watch it on loop!
Lastly, you'll go through a scheduled order so that you know Autoship is working for your B2B store.
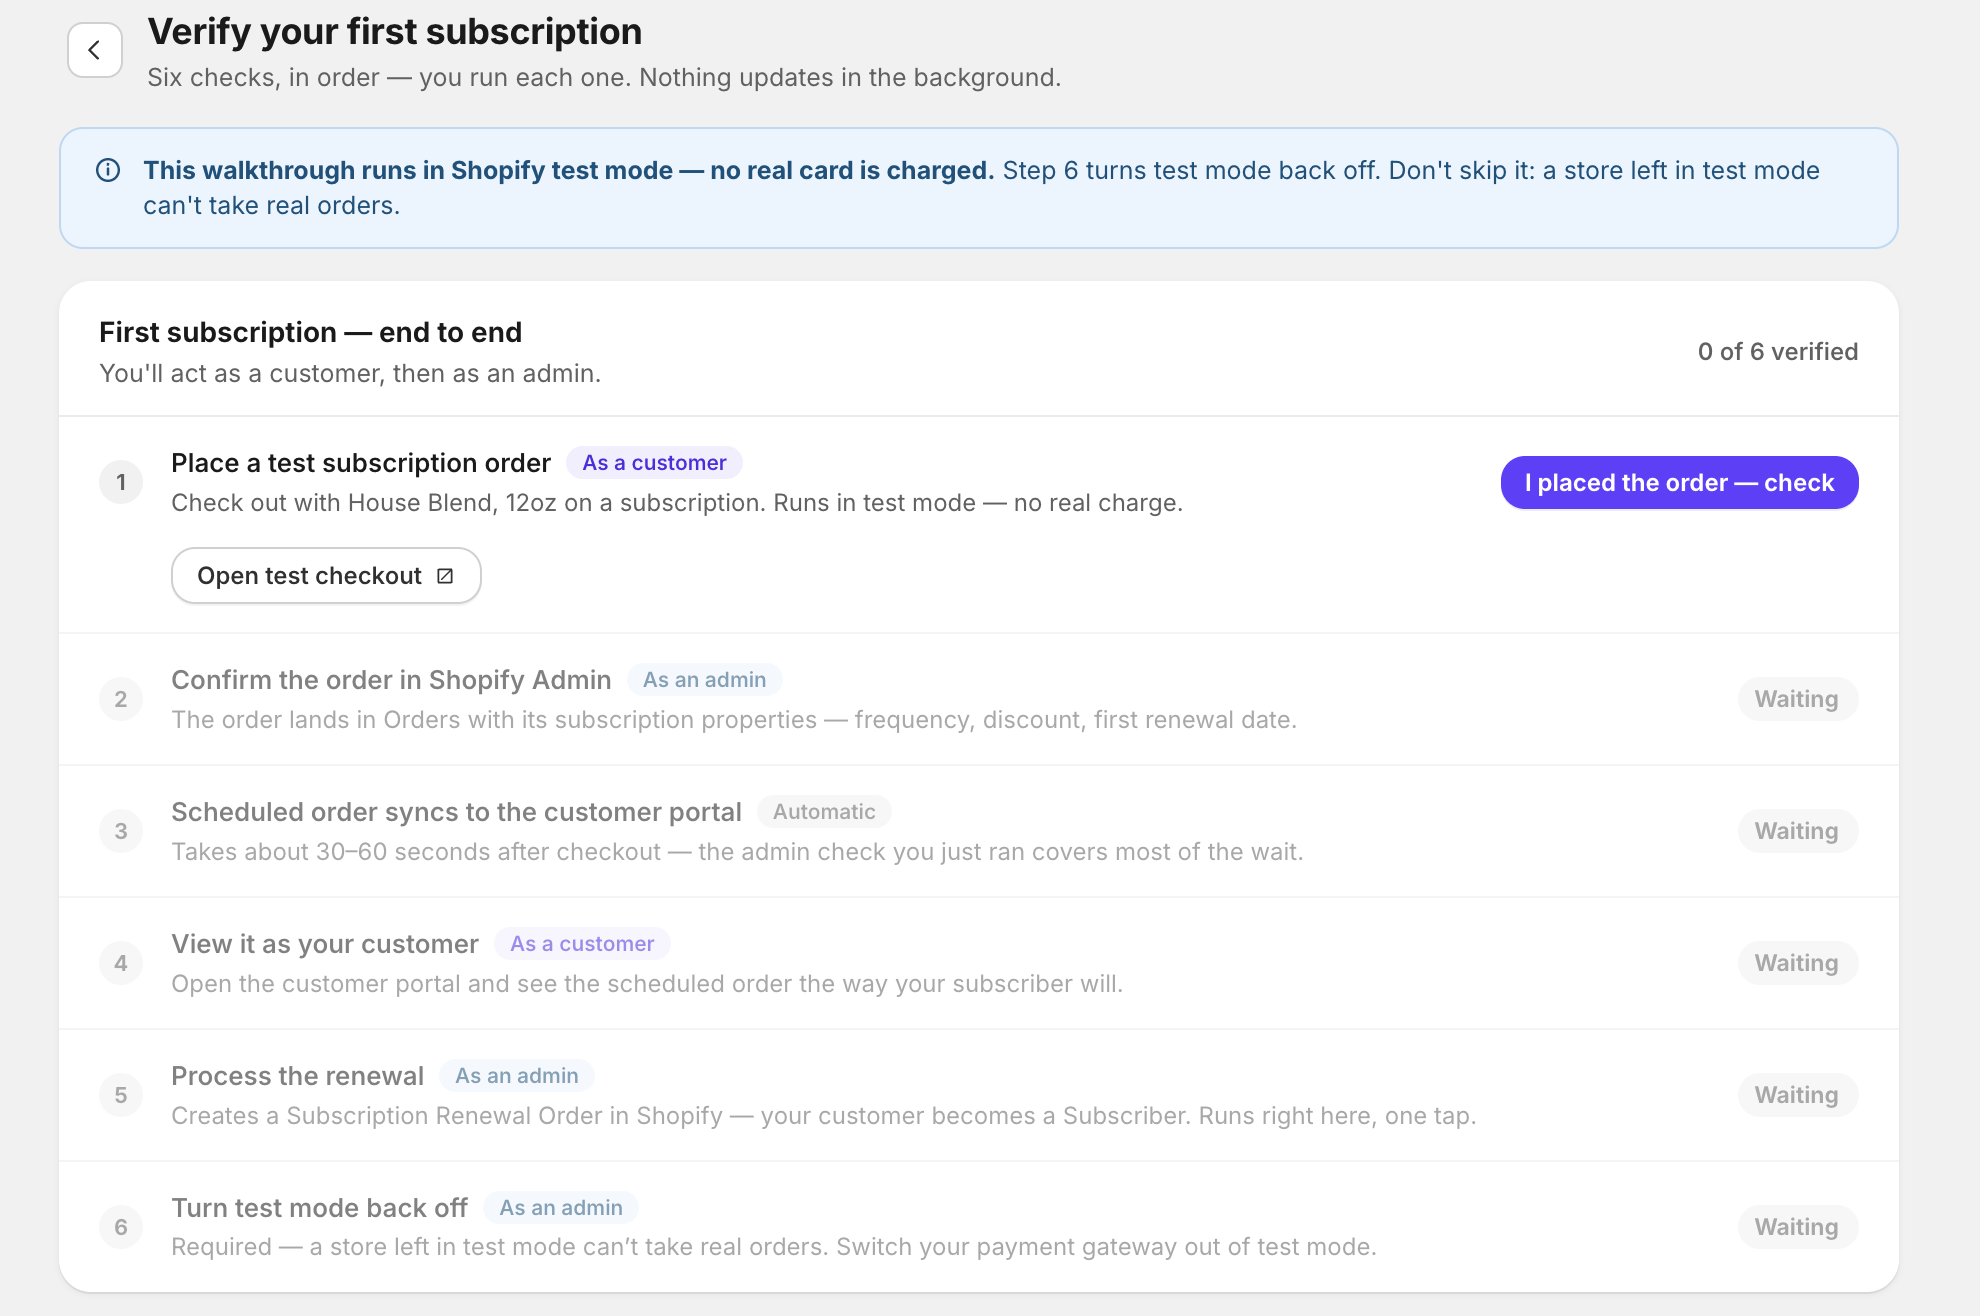
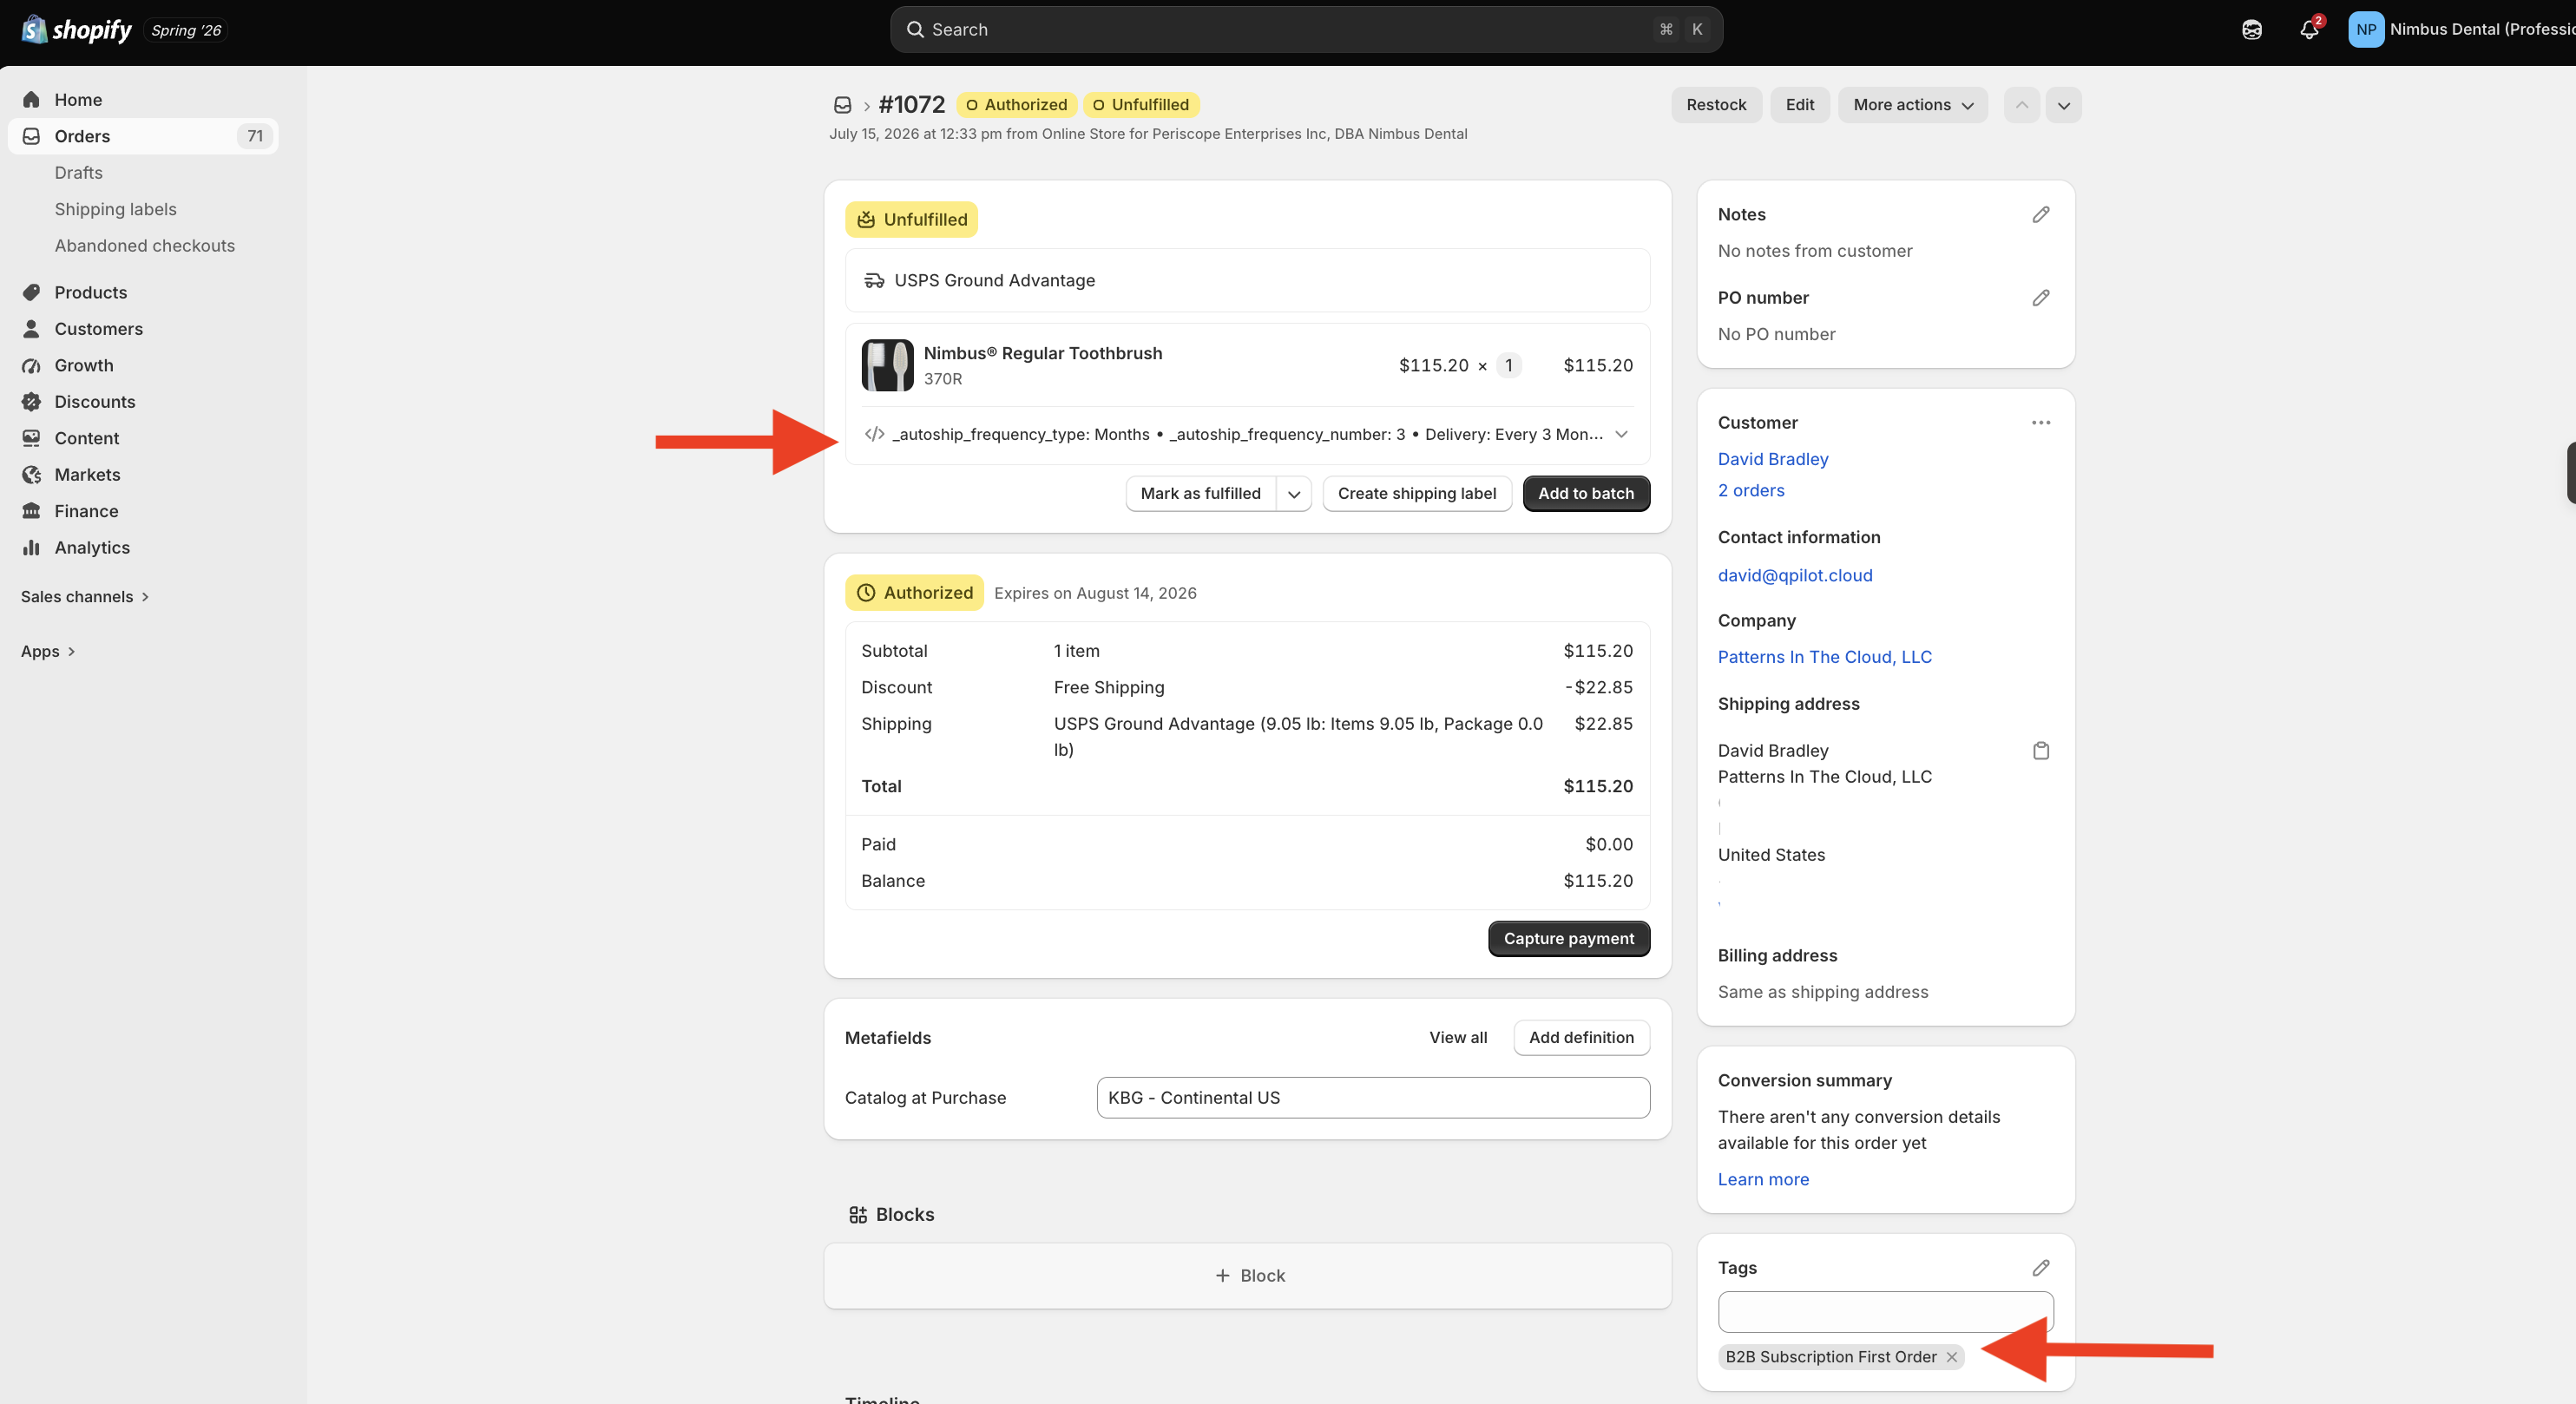
You've already added the ability to select a frequency for subscription on the product page, so you will check out as if you are a customer. Here is helpful Shopify documentation on checking out with a test order. You can verify the order is successful by going to your order screen in Shopify, using the admin link in step 2.
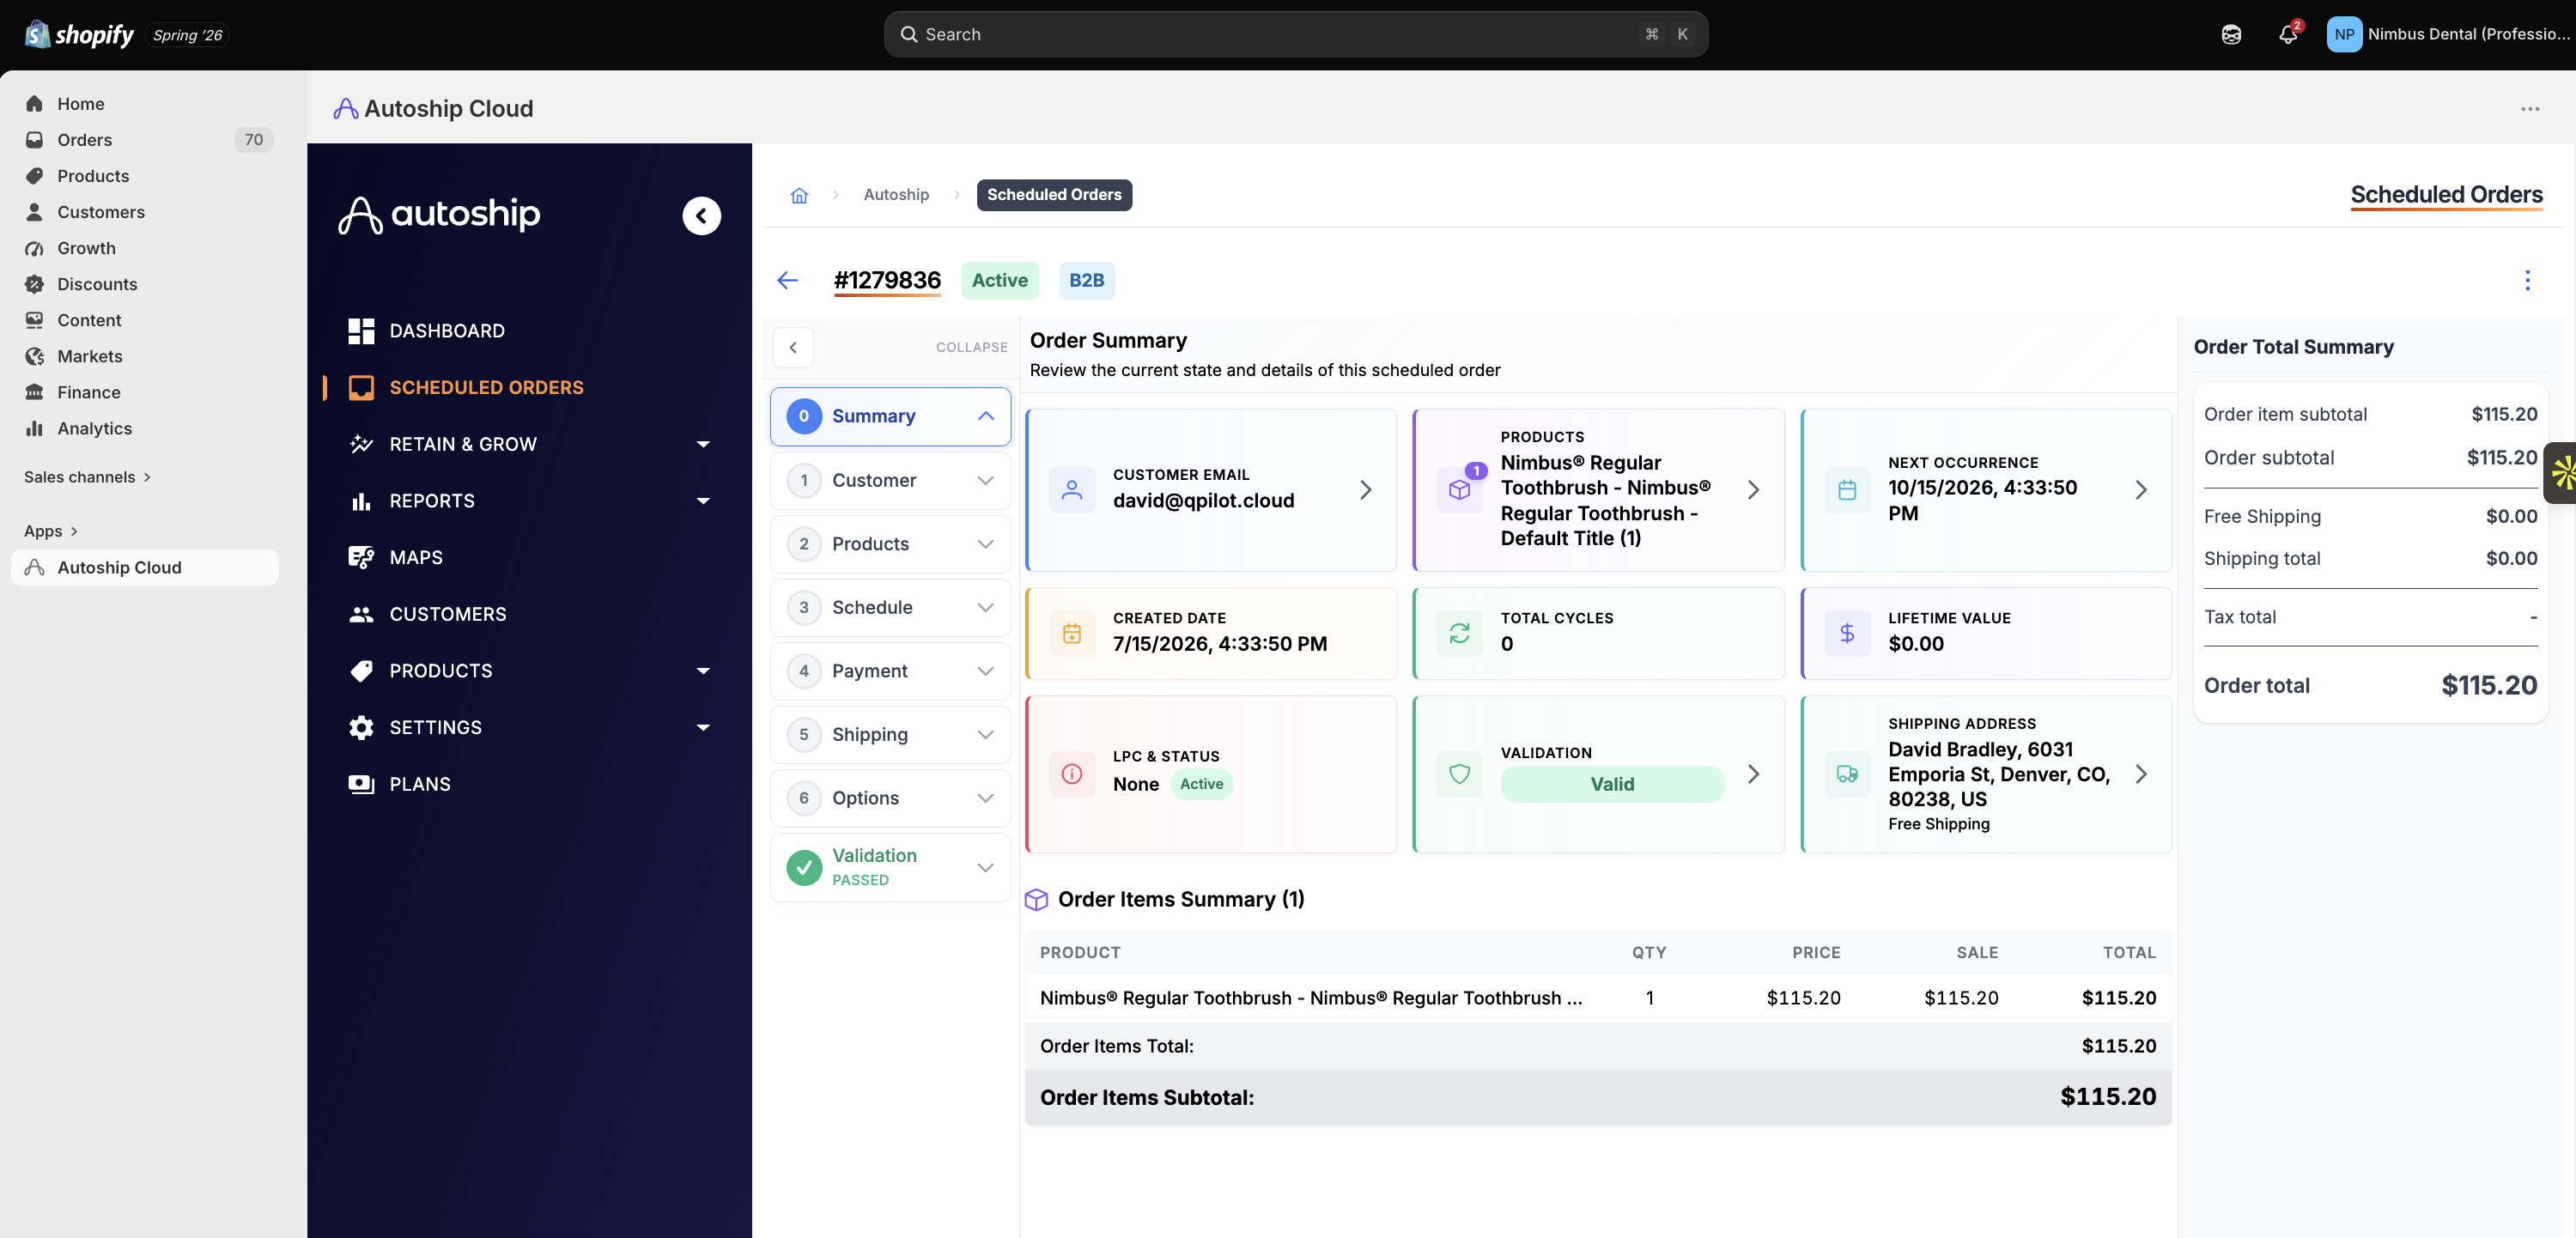
Next, navigate to the Autoship Cloud App and confirm that you can see a scheduled order.
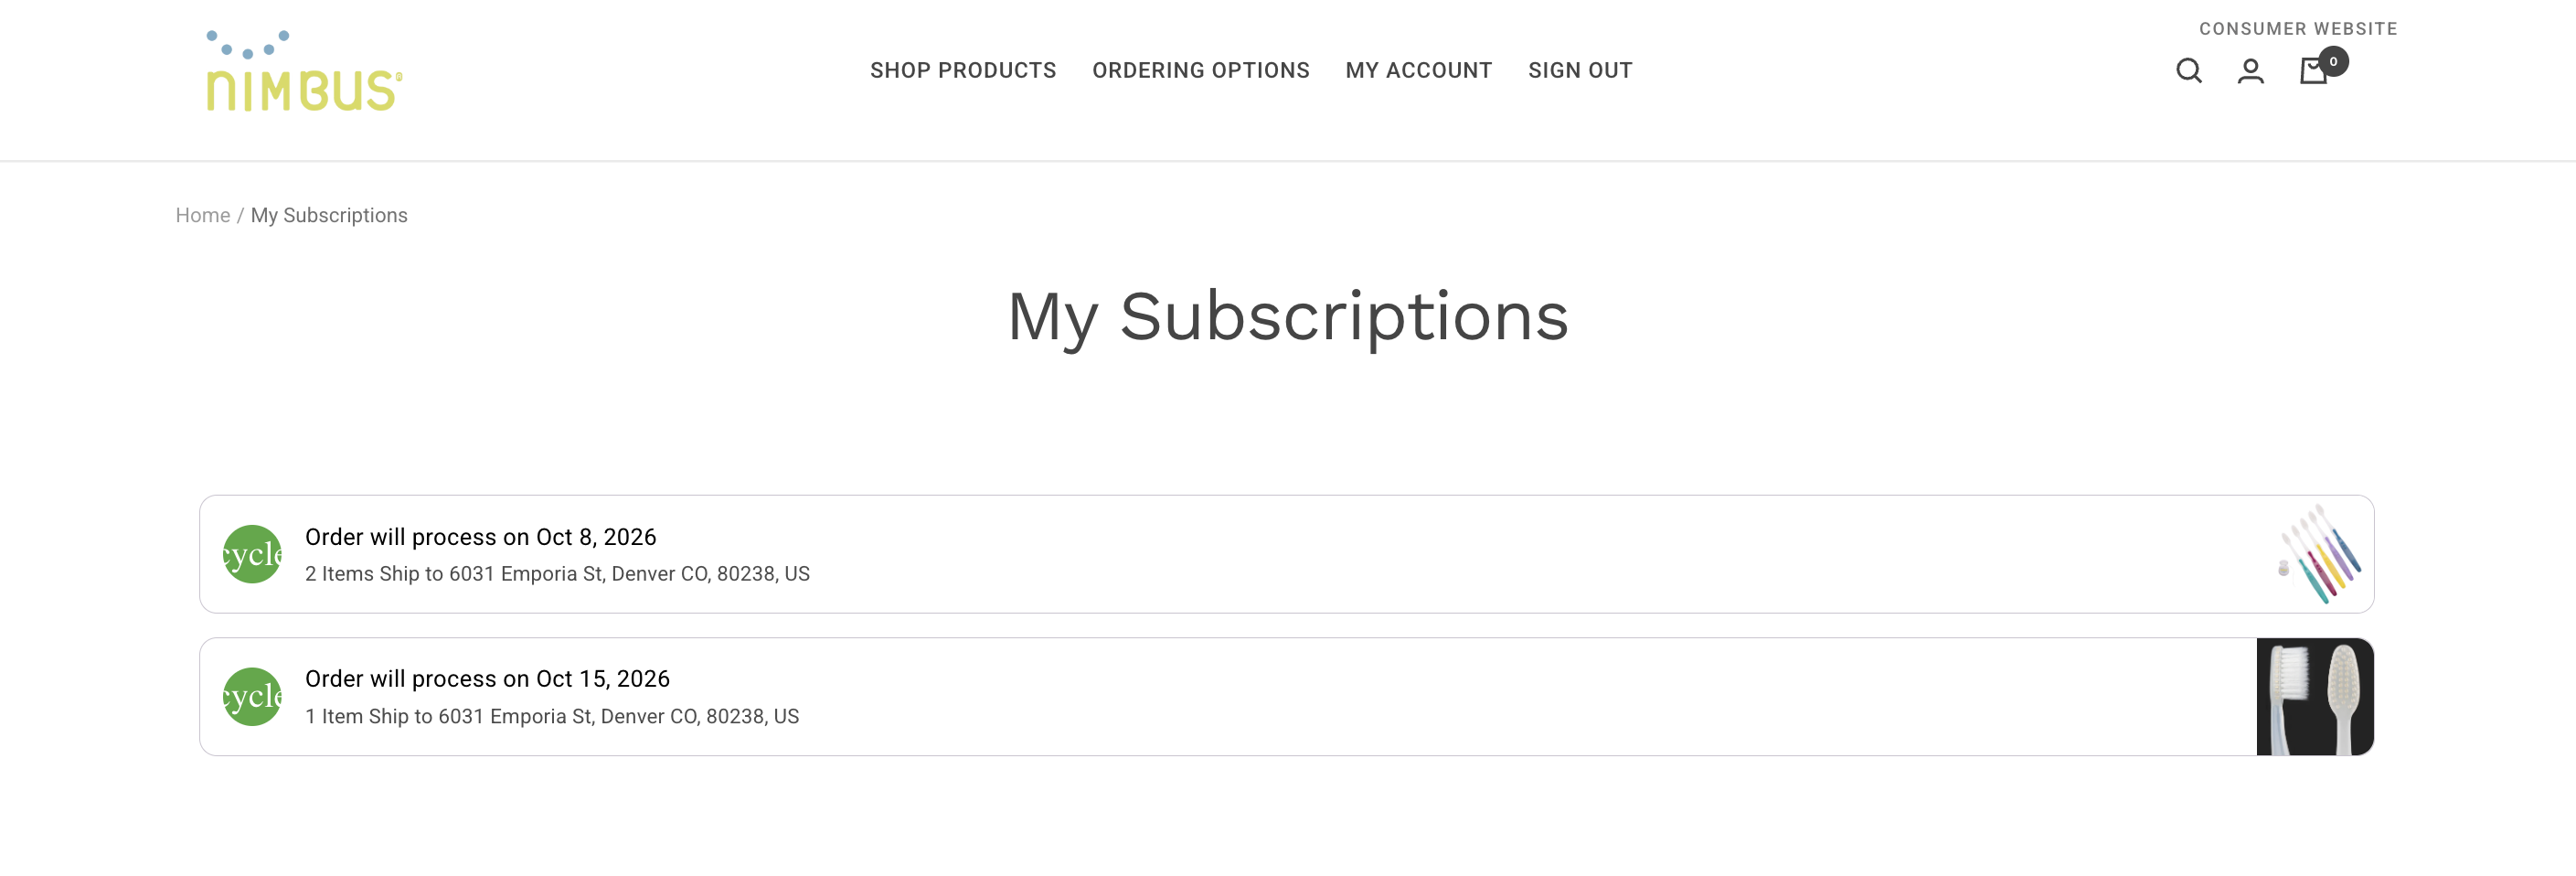
Next, check it out from your customer's point of view. Just make sure to use the same customer that is associated with the check out!
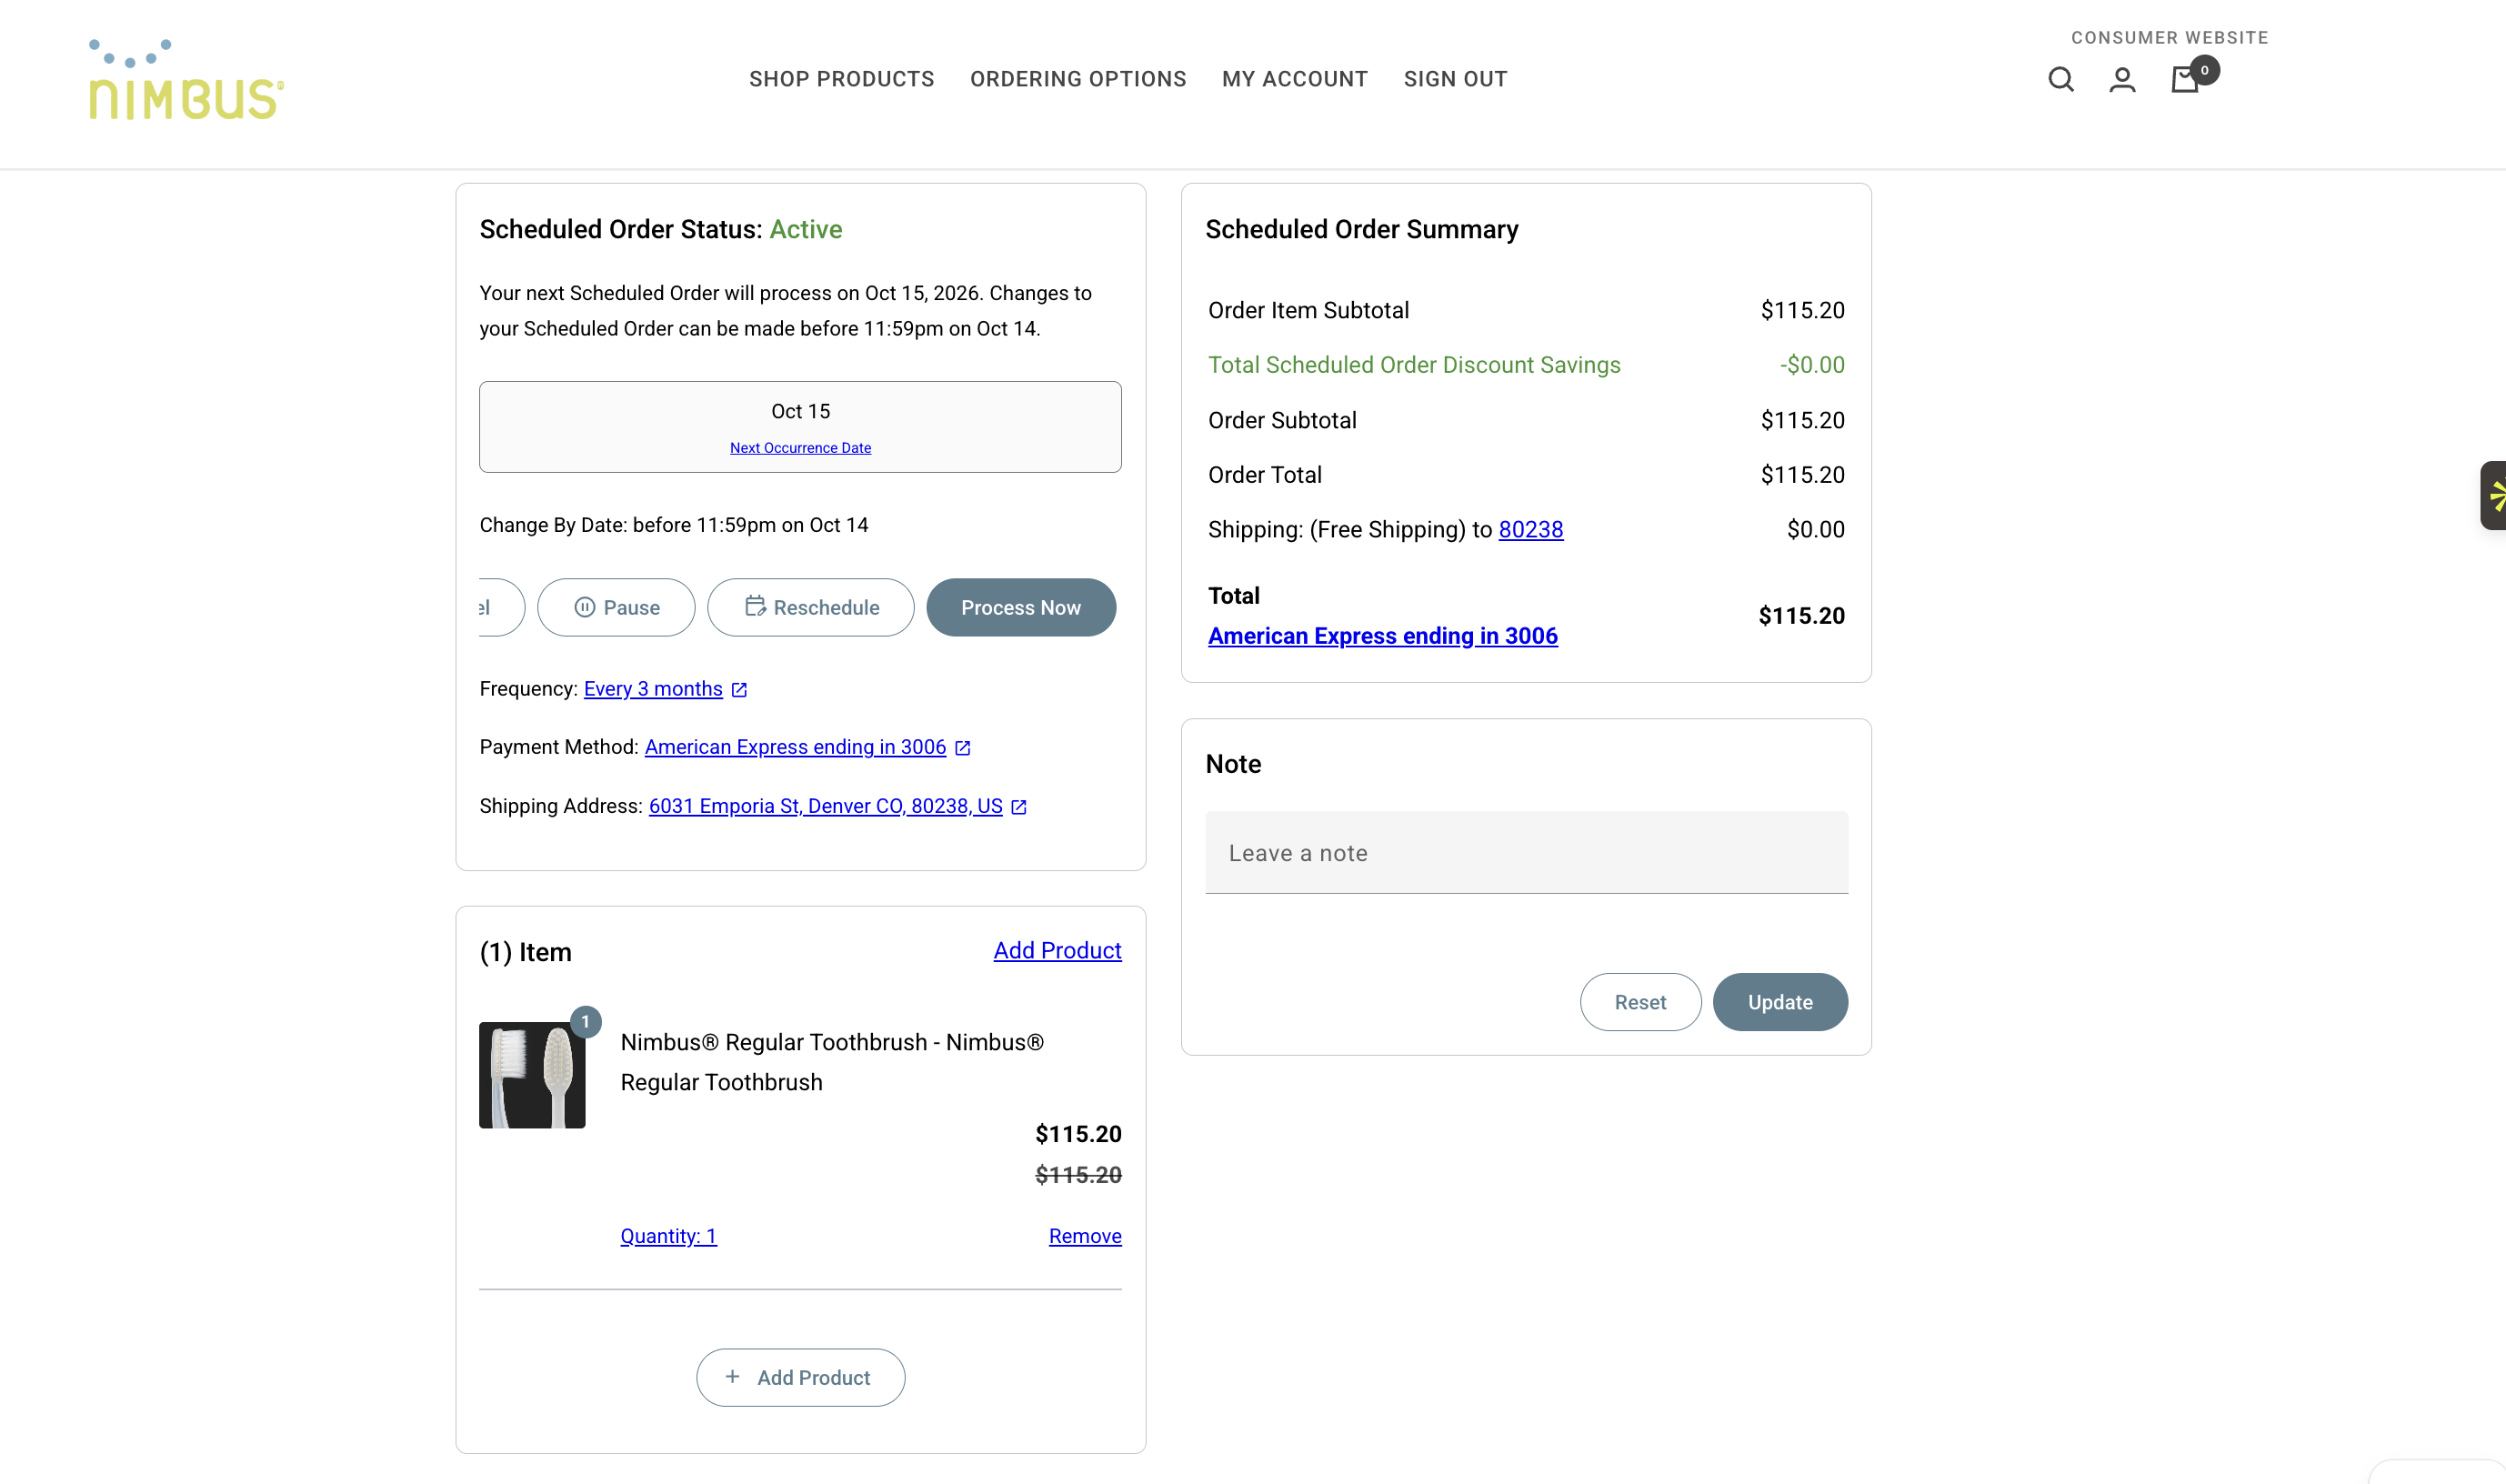
Once you click in to an order, and hit "make changes" you will see a detailed view of what your companies can see on their subscriptions. We can work with you to take away edits that you don't want if you see something you'd prefer to not allow changes on.
Lastly, you'll want to process a renewal on the admin side (within the Autoship Cloud app) so you know that a subscription first order works ✅ and that a processing for all future orders in the sequence will work as well.
From the autoship order, select the three dots in the upper right and select "process now". You'll see above that a customer can do the same from their subscription in the portal.
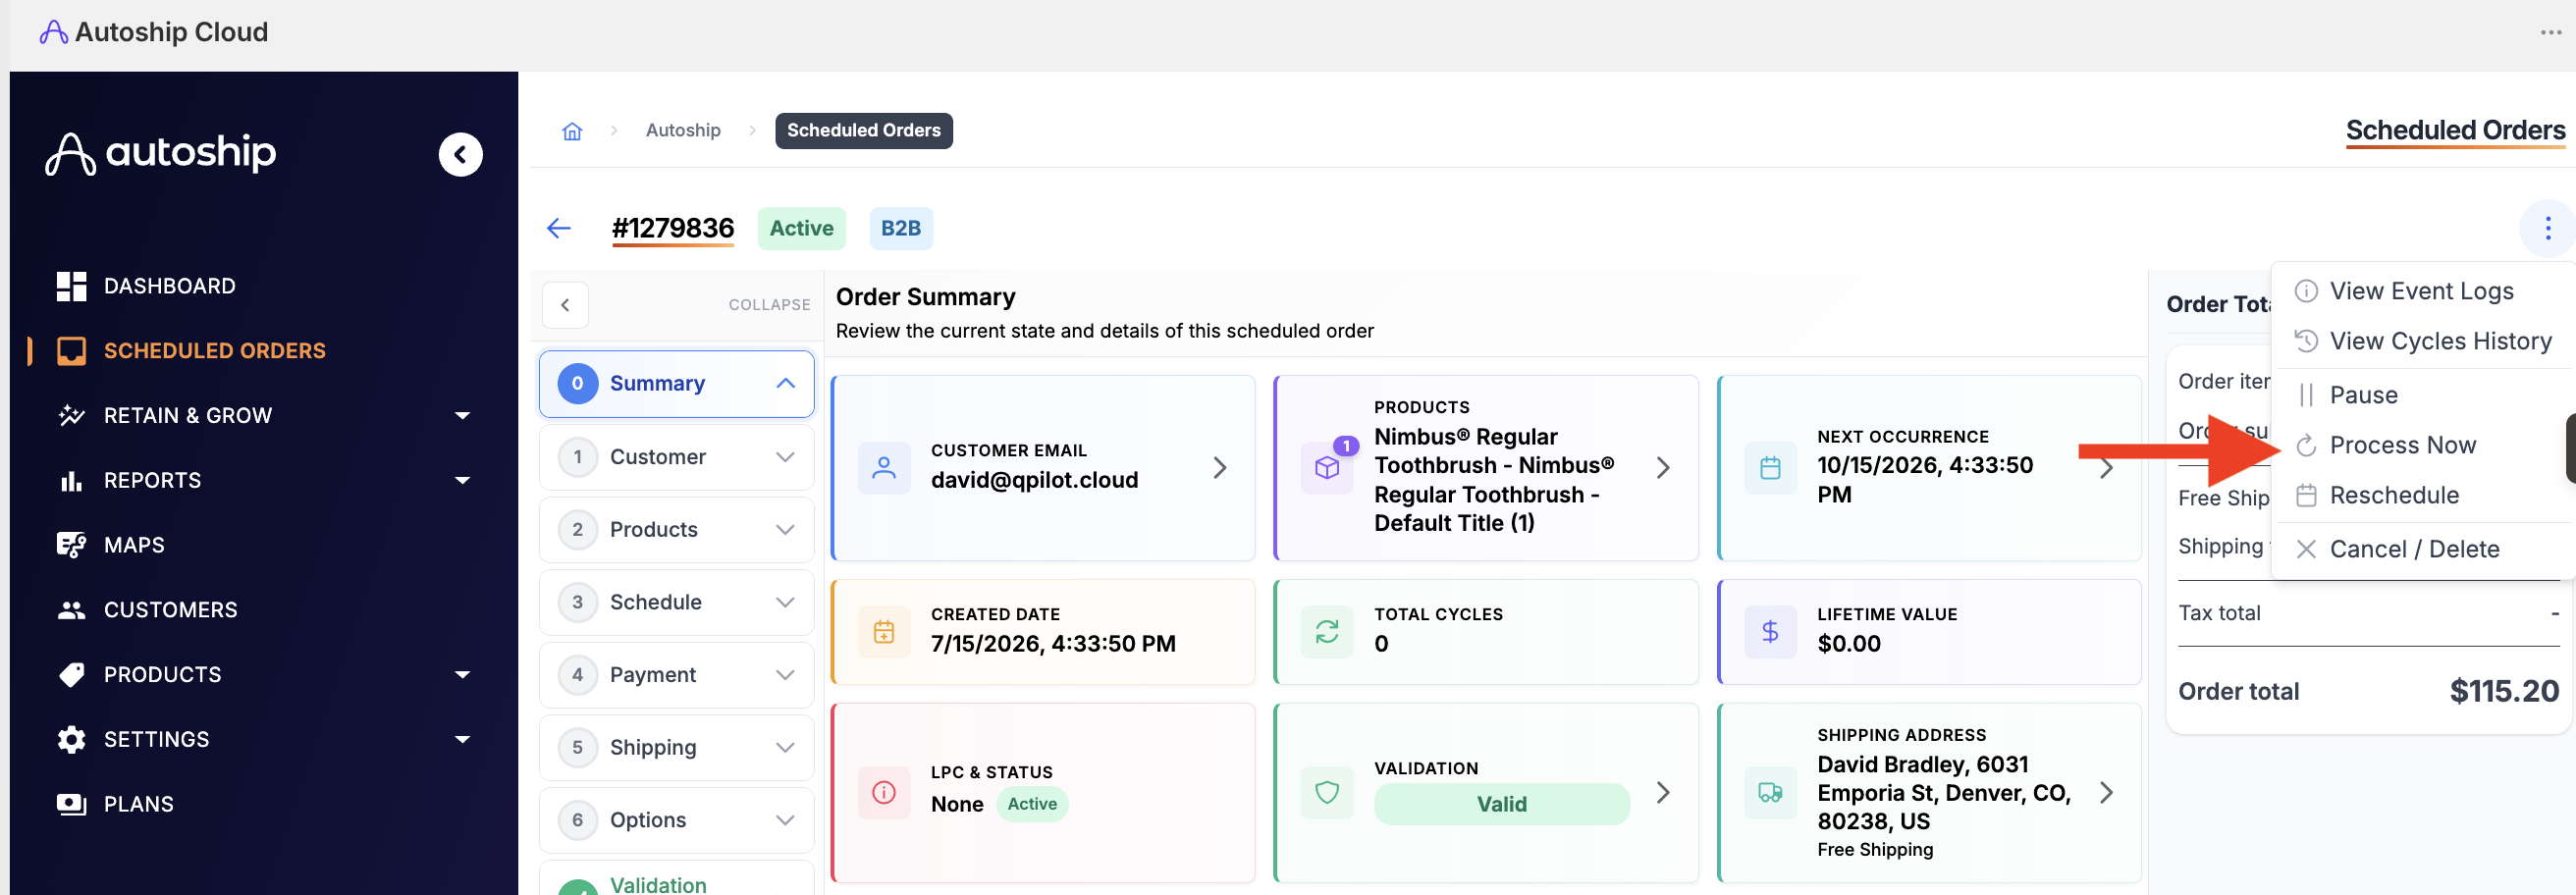
If you can want to confirm the second processing was successful, you can view the event logs after in the same admin menu (three items above "process now").
Congrats! You are live on Autoship B2B. We are a hands-on team though so please schedule a time that works for you to ask questions, go through settings and goals for your b2b subscription program.
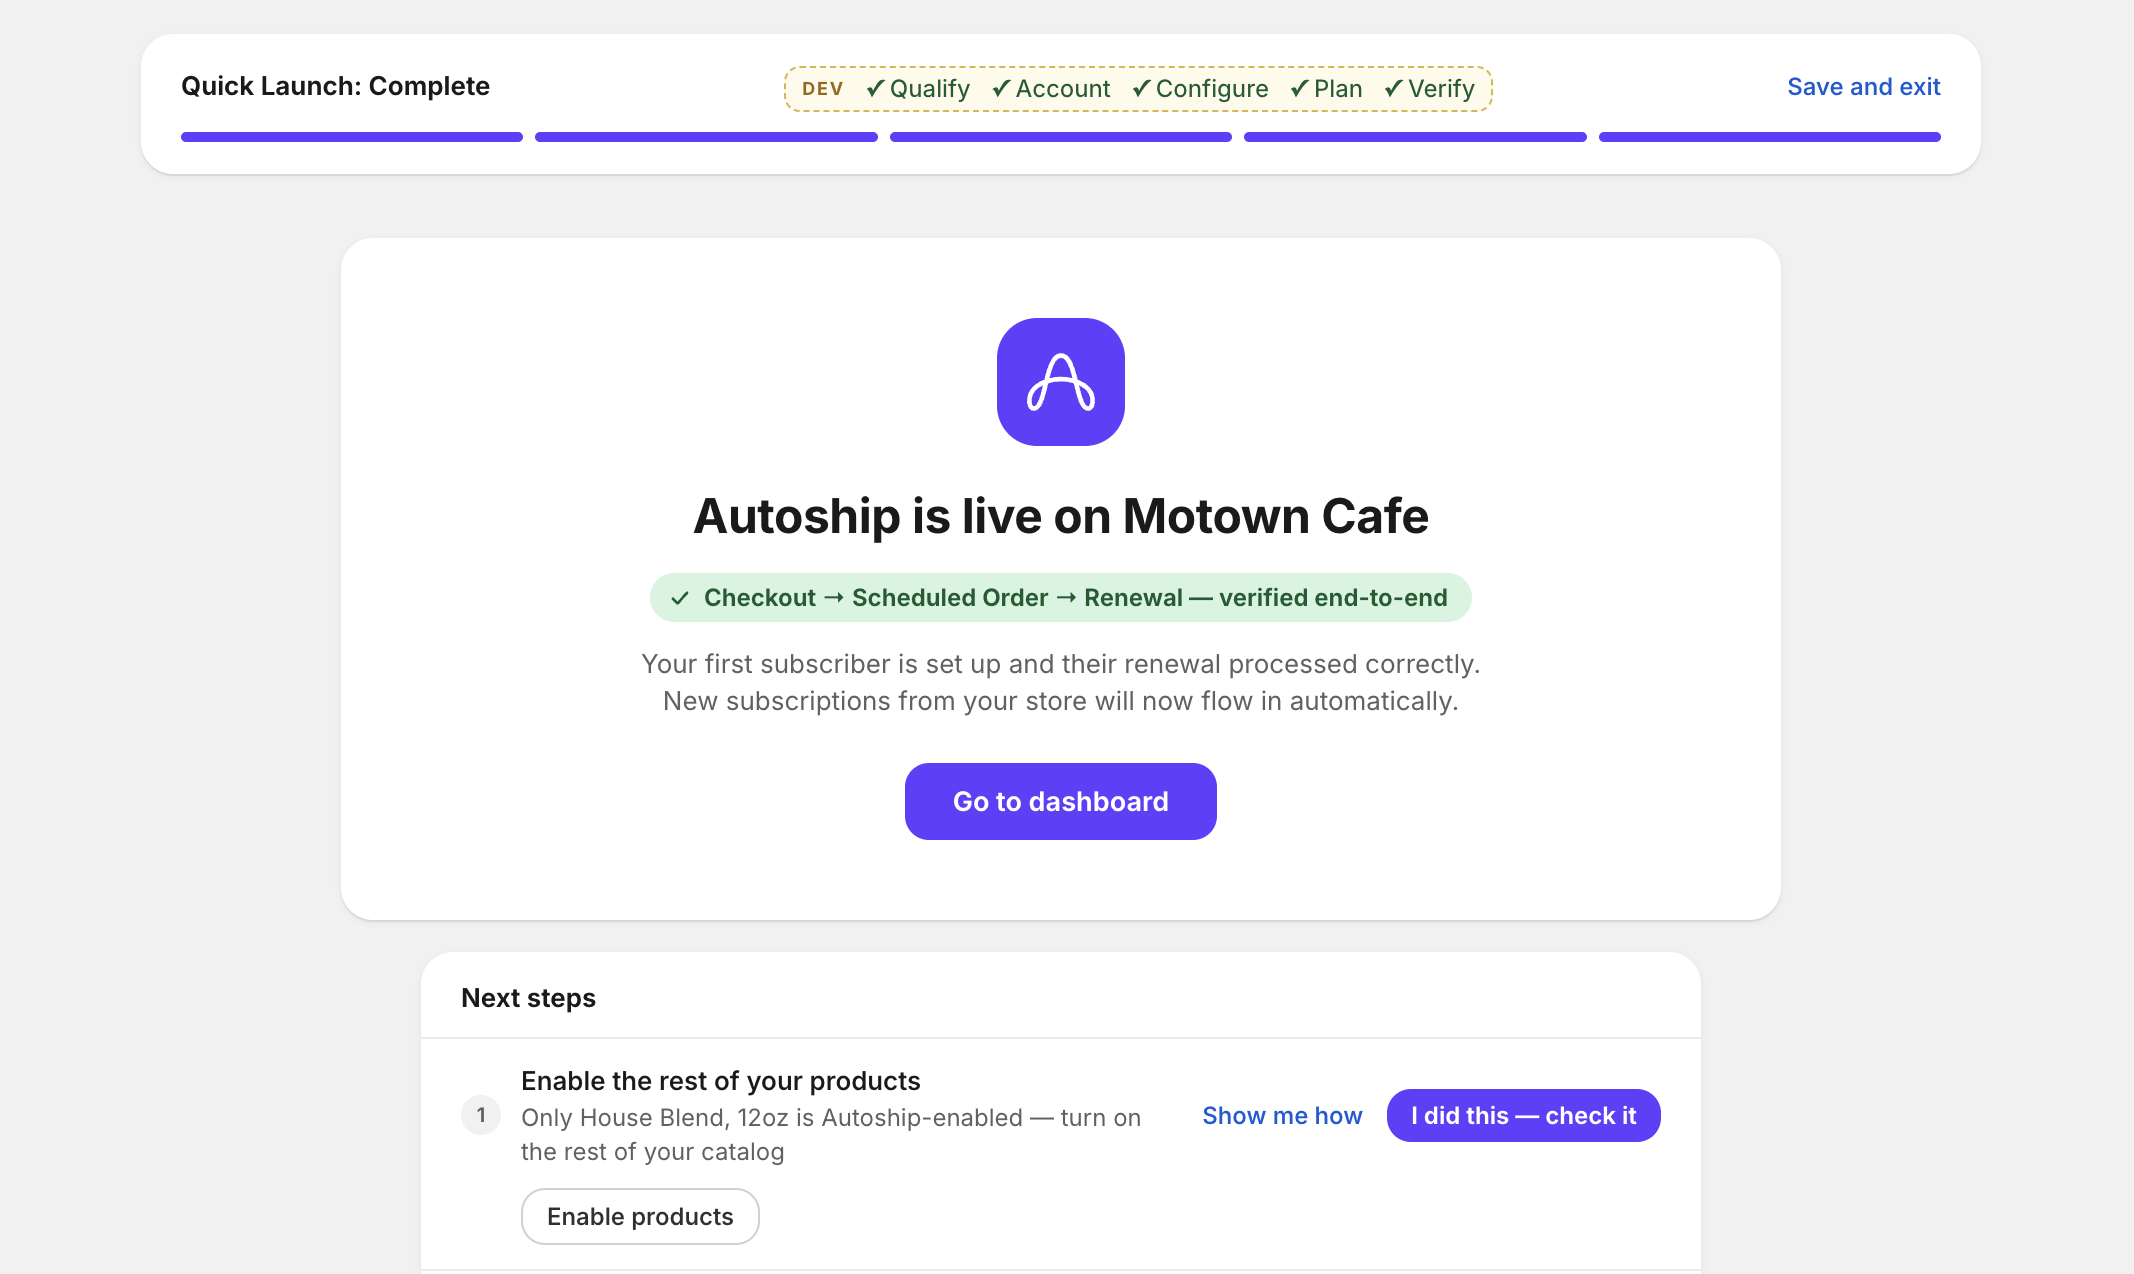
Note next steps that will help you get past "proof it works" to "this is the b2b subscription program I had in mind" by adding subscriptions on other products, adjusting frequencies or subscription incentive discounts. Autoship is incredibly flexible and we are here to make your program a success!