
[Shopify] Product Bundles
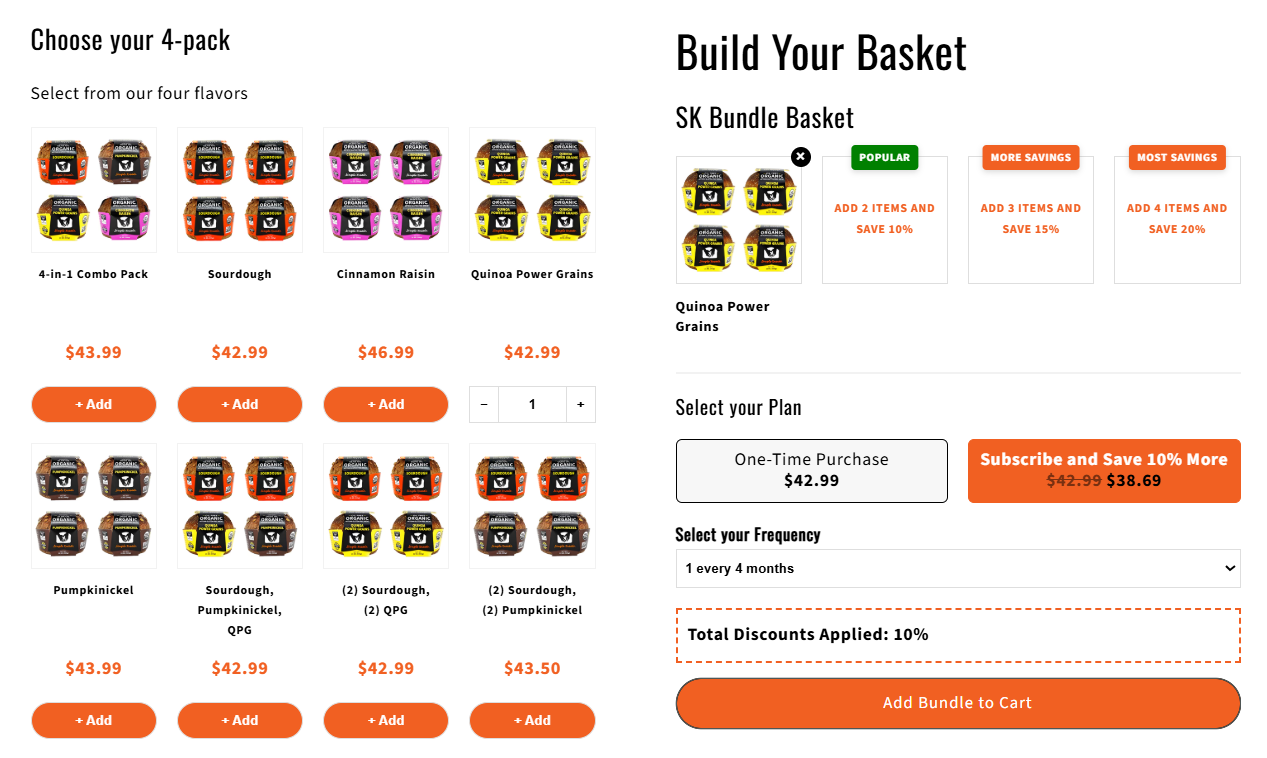
This guide walks you through creating a bundled product, making it live on your Shopify store, and adding it to your theme for customers to purchase.
Step 1: Create Your Bundle in QPilot Merchant Center
- Log into your QPilot Merchant Center.
- On the left hand menu click Bundles, then click the + sign on the bundles page
- Give your bundle a name (e.g., “Hydration Pack”).
-
Add products to your bundle:
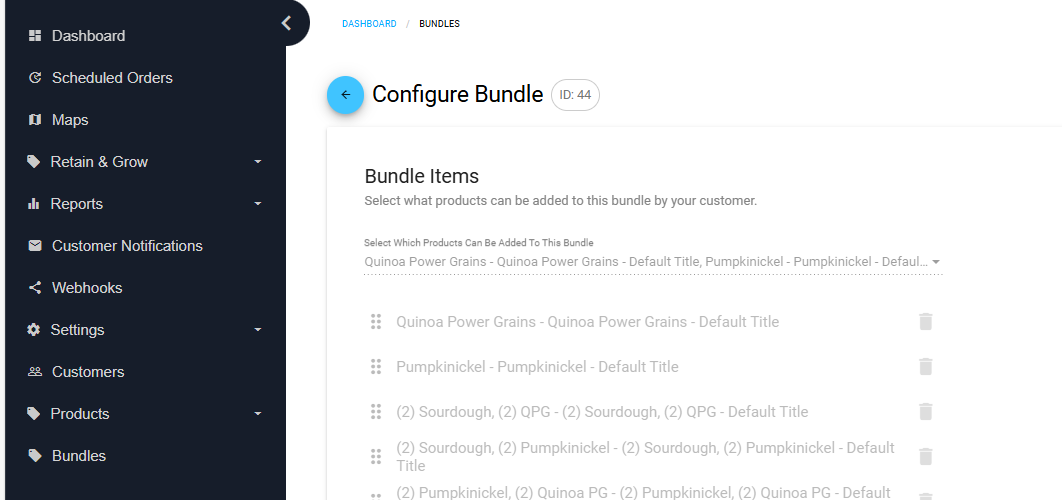
When you create the bundle, the sorting of the items is set and can't be re-ordered in the future. However, when an item goes out of stock, it will auto-sort to the bottom of the list for customers.
- Set the minimum and maximum number of products that can be selected.
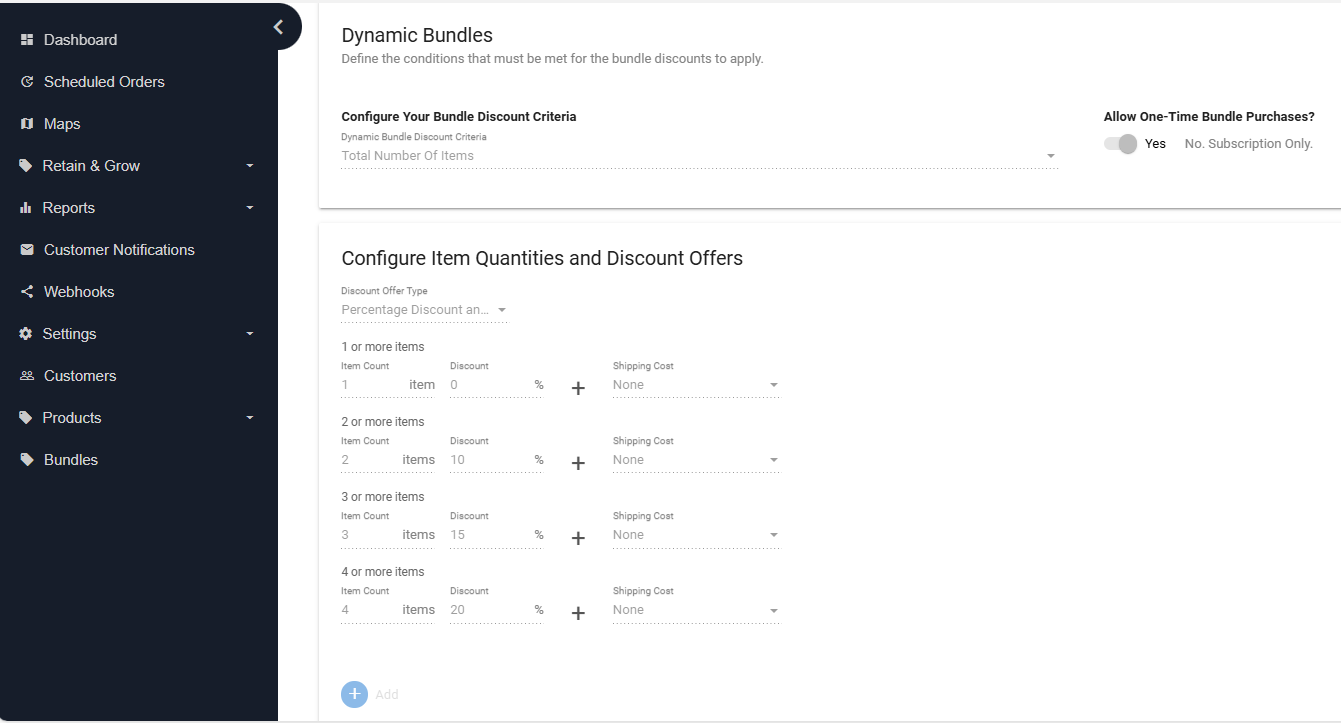
- Configure discounts based on the total number of products selected in the bundle.
- Choose whether customers can purchase a bundle as a one-time purchase or as an Autoship order.
Protip: You can default to the subscription option on the product page! See the widget builder in step 2 (below).
- Configure item quantities and discount offers by outlining your offer for each item count. You can set a discount percentage on the total bundle price and/or set the shipping cost. Setting the shipping cost to $0 will enable free shipping.
-
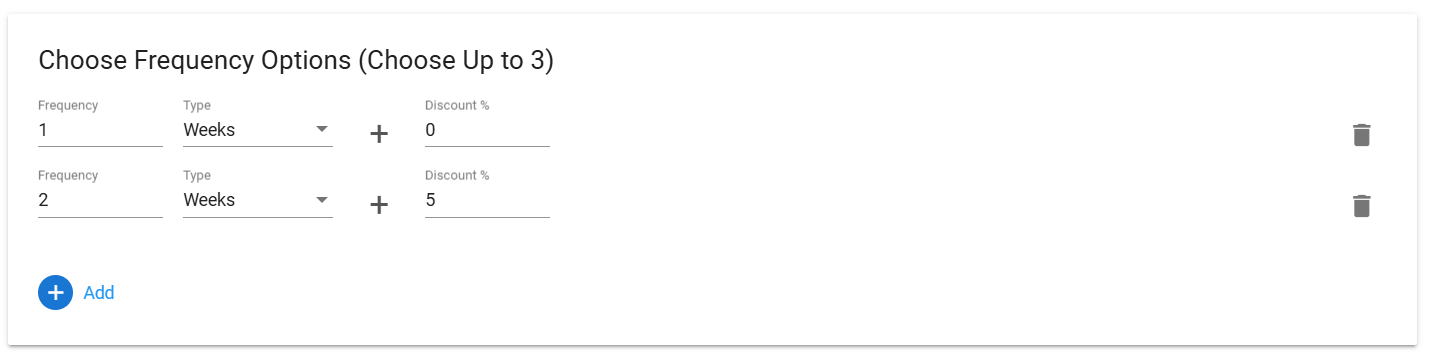
Add the desired frequencies to the bundle. You can also set frequency-based discounts. You must set a discount option for each frequency (even if it's 0).
- Select "Activate Bundle". This will auto-create the bundle product on your Shopify Store.
- Note: You can not edit bundle products once activated, only view them.
Deleting a bundle in QPilot will remove it from your Shopify Site as well.
Step 2: Customize and Add the Bundle Widget to Your Theme
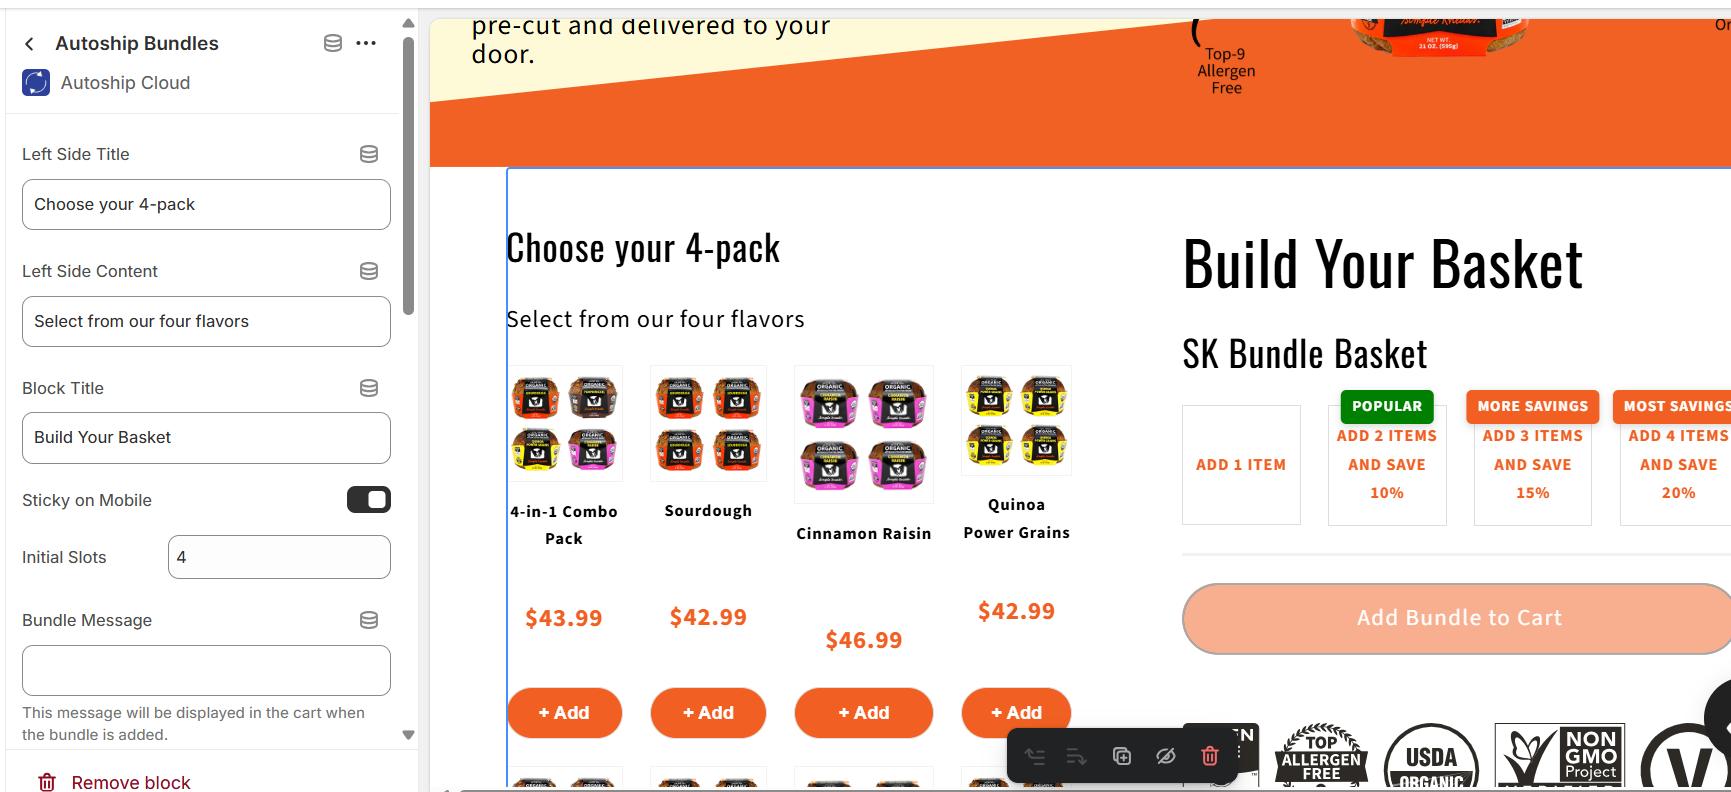
- In Shopify Admin, go to Online Store > Themes > Customize.
- Navigate to Products and create a new template for your bundle products. Name it something you'll recognize later — you'll select it by name in Step 3.
- Once created, add an app block, select App, then add "Autoship Bundles". This will add the bundle widget to the bundle product page.
- Remove the original product section that was on the template.
- Protip! Select the Autoship Bundle widget to customize your bundle page.
- At the top left of the theme editor, change the product you are previewing to the bundle product associated with this template.
-
Important: every other product previewed on this template will show a broken-looking bundle page. Always preview with the bundle product itself.
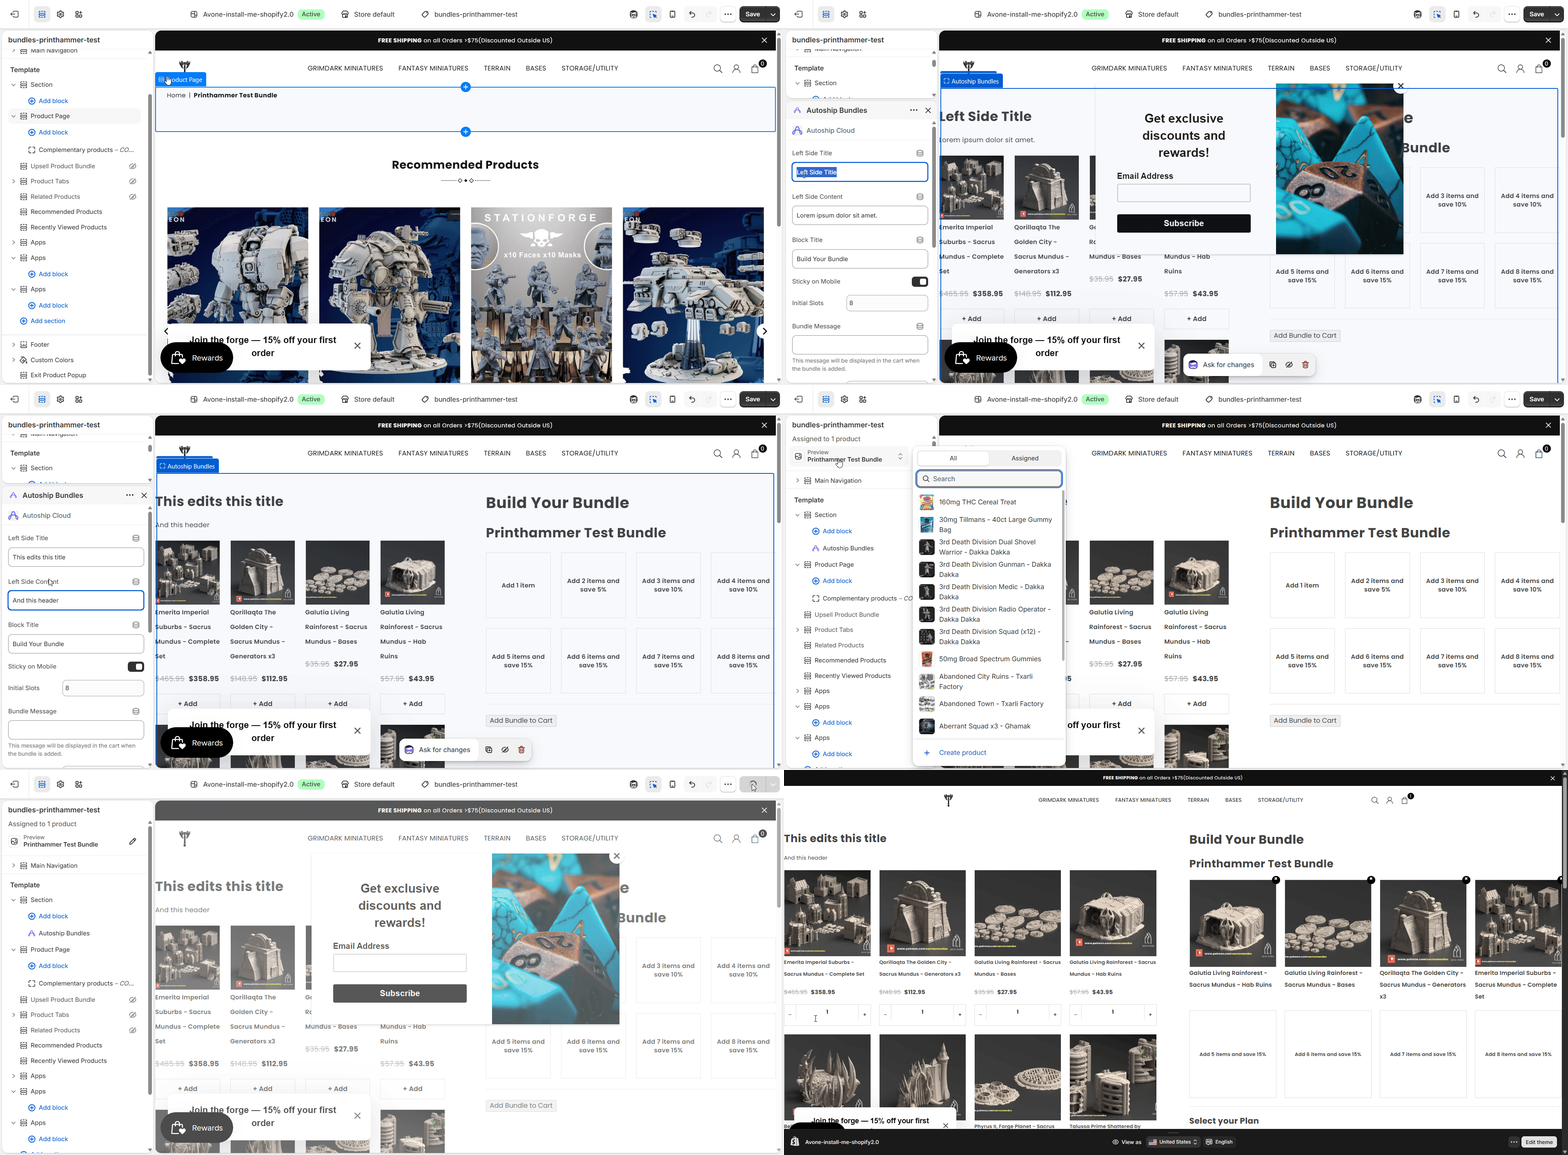
If bundle doesn't show correctly don't worry the next step will fix it!
-
Step 3: Sync Bundle to Shopify
- Go to your Shopify Admin > Products.
- Search for the bundle name (e.g., “Hydration Pack”) — it should appear as a regular product.
- On the right hand side under the 'Publishing' section, click 'Online Store' or 'Sales Channels'. A list of sales channels will show up — tick ONLY the Online Store channel.
-
On the bottom right of the product page under 'Theme Template', click the dropdown that says 'Default product' and choose the template that you named in your theme.
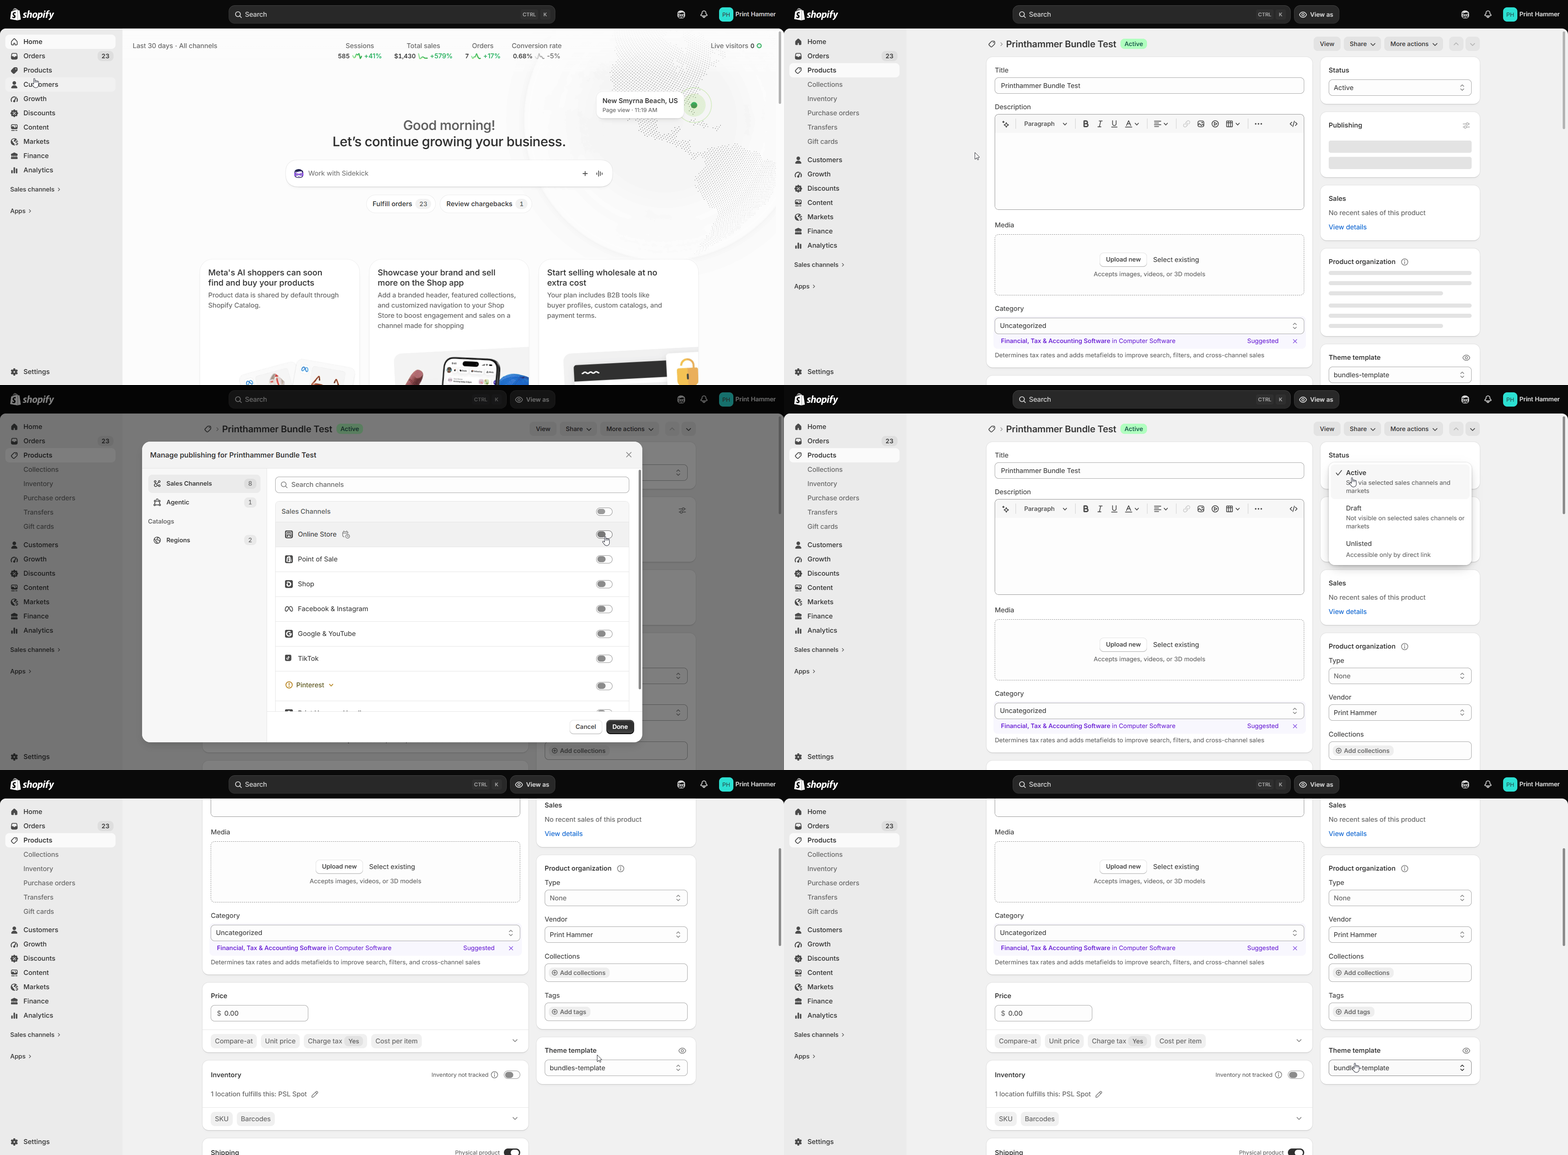
- Click Save. Your bundle will now populate on the theme page where you view it, and will be available to customers for one-time or subscription.
