
How Customers View/Manage Their Scheduled Orders
Customers view and manage their Scheduled Orders from your storefront. These are the default labels — you can change most of them in your Autoship settings, so your customers may see different wording.
How customers view their Scheduled Orders
Shopify
Customers select My Account > Manage Subscriptions. You can also link directly to the Manage Subscriptions page from anywhere on your site.
The page only appears once you have added the Autoship Cloud app block to your theme. If you have not done this yet, see Getting started — D2C on Shopify before continuing.
WooCommerce
Customers select My Account > Scheduled Orders. This page is added automatically when you install the Autoship Cloud plugin — see Getting started — D2C on WooCommerce.
Choose how the page displays in WP-Admin > Autoship Cloud > Settings > Options, under "Displaying Scheduled Orders in My Account":
- v2 Subscriber Portal — recommended. This has our new features like retention workflows, snooze, ect.
-
Native UI — displays Scheduled Orders using WordPress templates.
The steps below use the v2 Subscriber Portal.
Changing when the order arrives
Change the date of the next order
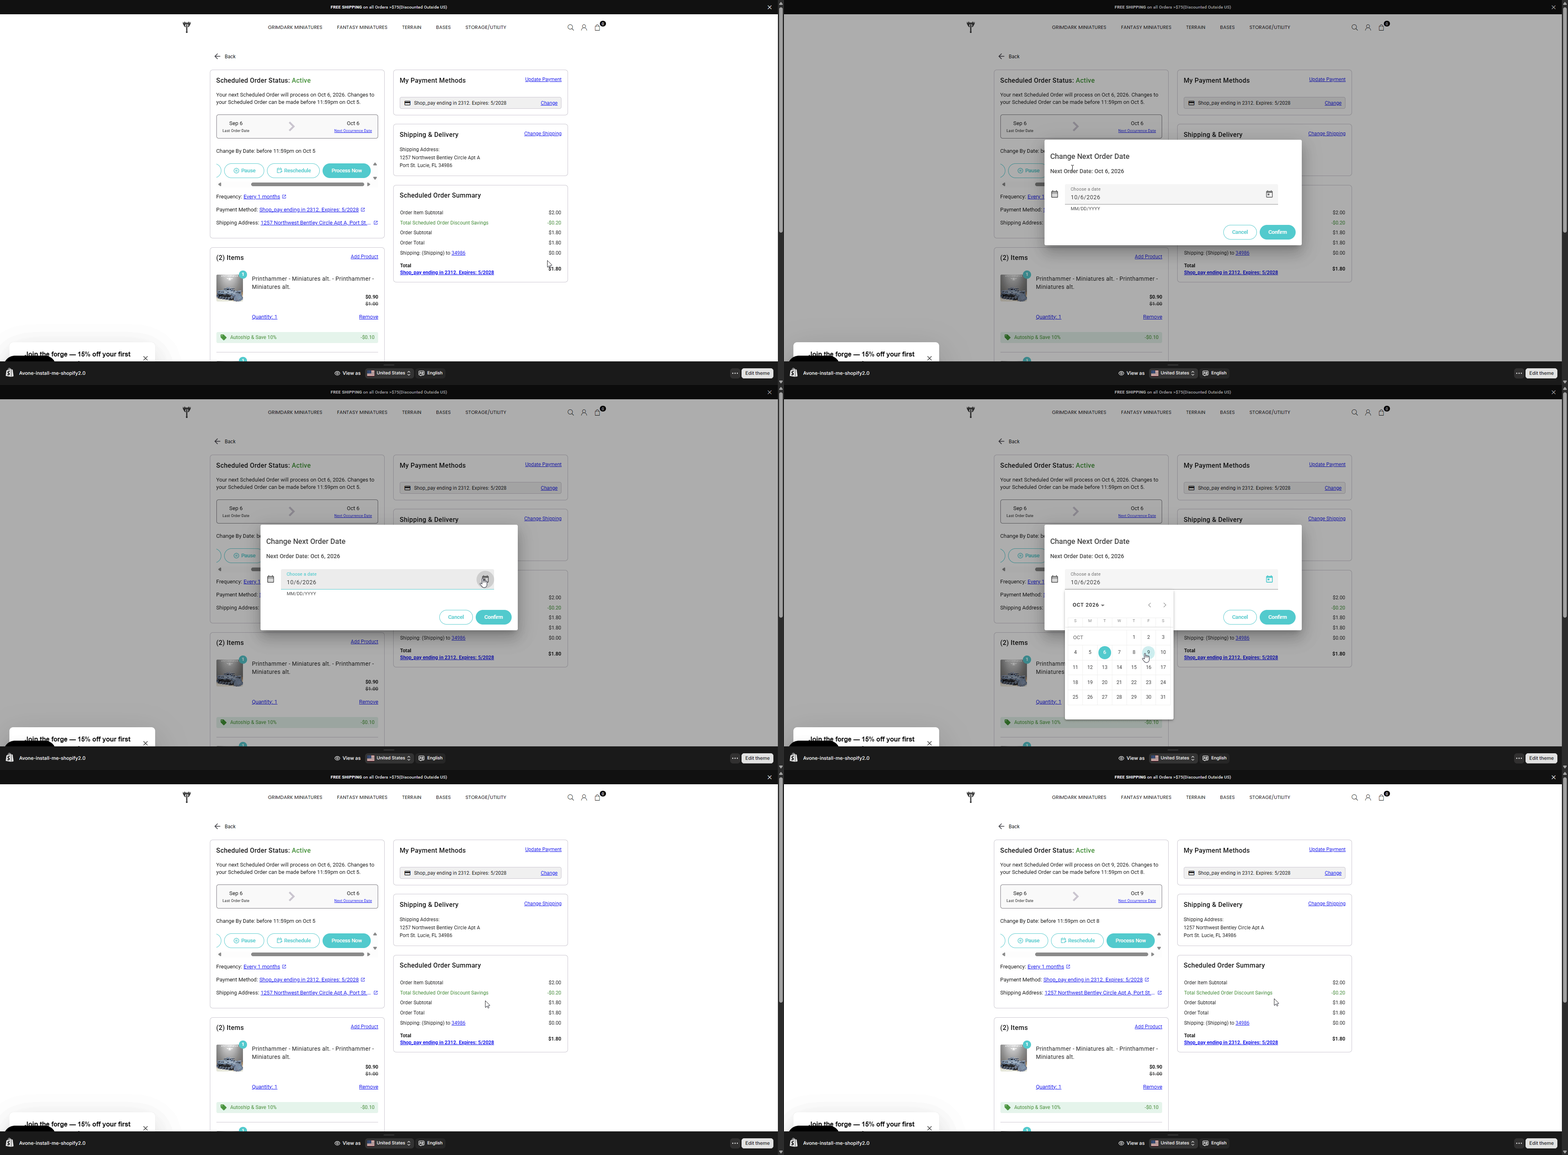
To change the date of the next order, visit My Account > Manage Subscriptions, select "Make Changes" on the Scheduled Order and select "Reschedule". Choose a new date and select "Confirm".
Change how often the order arrives
To change the frequency, visit My Account > Manage Subscriptions, select "Make Changes" on the Scheduled Order and select the link next to "Frequency". Enter a number and choose "Days", "Weeks" or "Months", or choose "Every X day of the week" and pick a day, or "Every X day of the month" and enter a date from 1 to 30. Select "Confirm".
Pausing, resuming and cancelling
Pause the Scheduled Order
To pause, visit My Account > Manage Subscriptions, select "Make Changes" on the Scheduled Order and select "Pause". Select "Confirm". The Scheduled Order will not process until the customer resumes it.
If you have Snooze enabled, customers will also see a Snooze option in this dialog.
Unpause the Scheduled Order
To unpause, visit My Account > Manage Subscriptions, select "Make Changes" on the Scheduled Order and select "Resume". The Scheduled Order becomes Active again and processes on its next occurrence date. There is no confirmation step.
Cancel the Scheduled Order
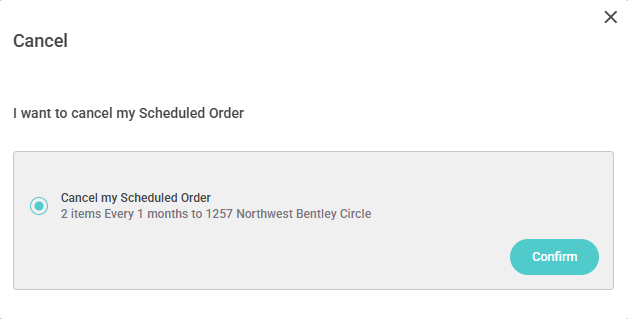
To cancel, visit My Account > Manage Subscriptions, select "Make Changes" on the Scheduled Order and select "Cancel". Select "Confirm". The confirmation displays the item count, frequency and shipping address so the customer can check they have the right Scheduled Order.
If you have a Retention Workflow enabled, customers may see additional options when cancelling.
Changing the products
Add a product
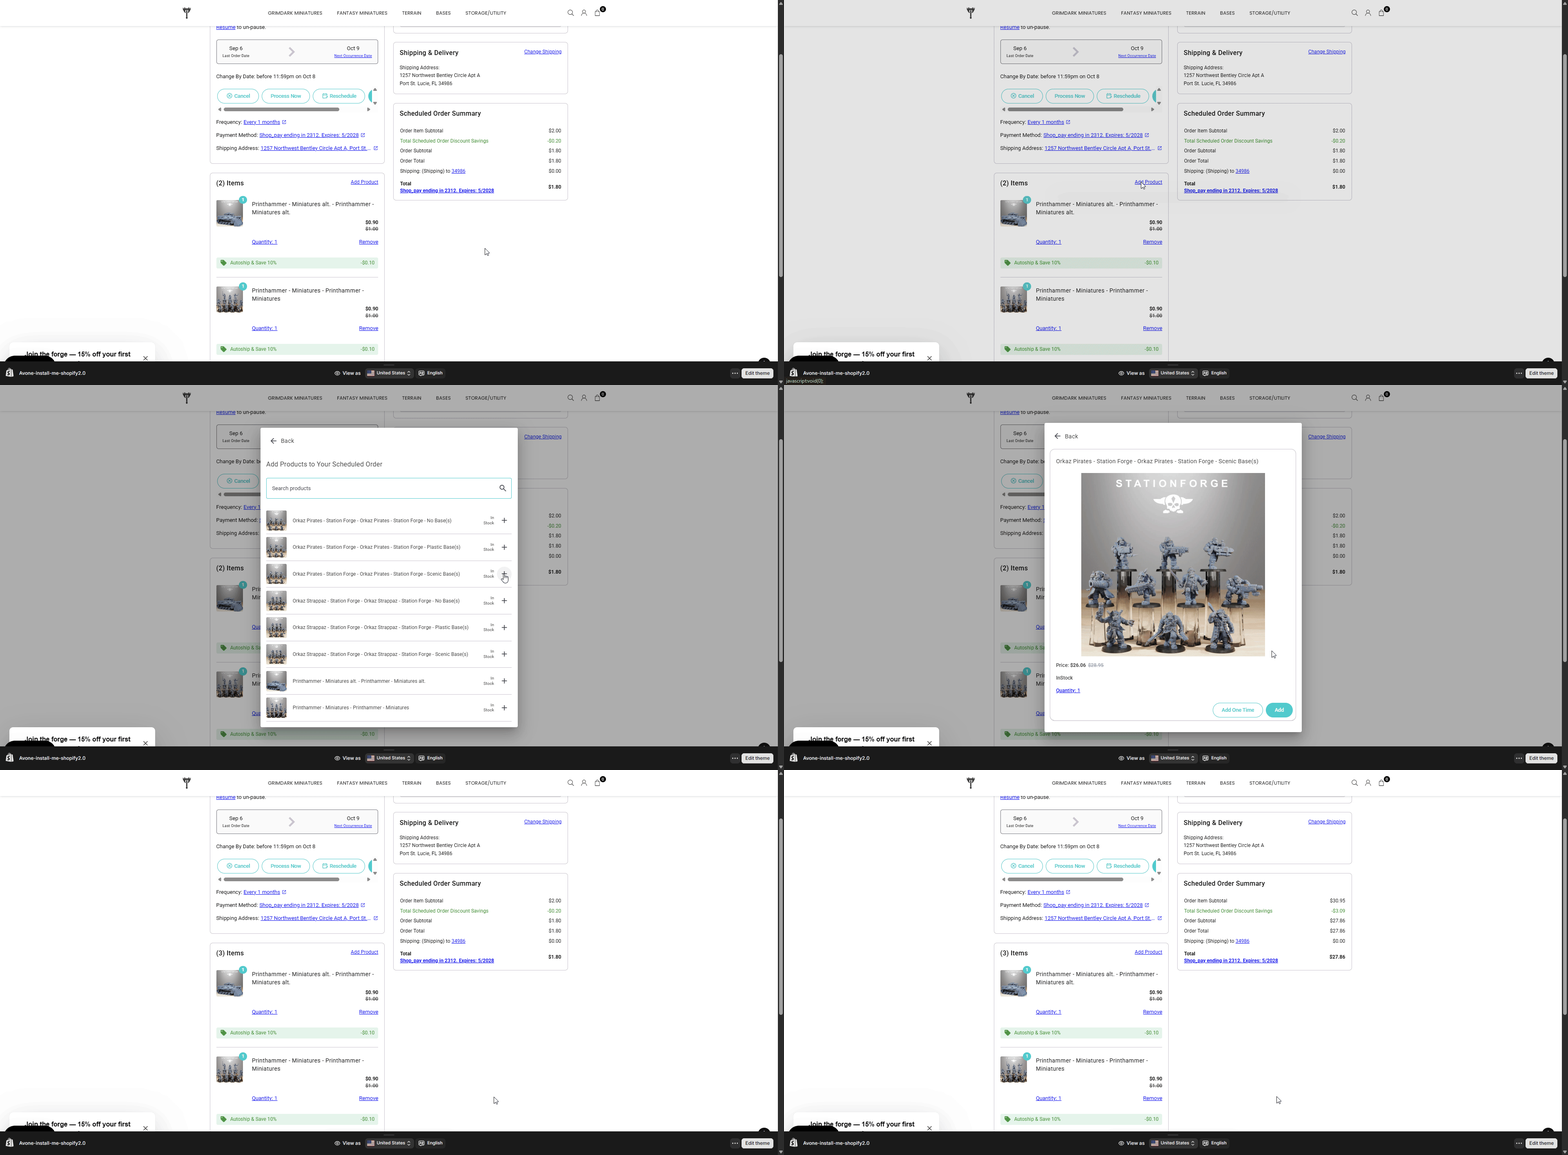
To add a product, visit My Account > Manage Subscriptions, select "Make Changes" on the Scheduled Order and select "Add Product". Search for the product or scroll the list, then select "+". Stock status is displayed next to each product. The product is added straight away — select "Back" to return to the Scheduled Order.
Important: Products added this way repeat on every order going forward. Customers cannot add a product as a one-time item from the portal. To send a one-time item, use a MAP to add and then remove the product.
Change the quantity of a product
To change a quantity, visit My Account > Manage Subscriptions, select "Make Changes" on the Scheduled Order and select "Quantity" on the product. Use "−" and "+" to set the amount, then select "Update".
Important: Quantity cannot be set below 1. To take a product off the Scheduled Order, use "Remove".
Remove a product
To remove a product, visit My Account > Manage Subscriptions, select "Make Changes" on the Scheduled Order and select "Remove" on the product. Select "Confirm". The confirmation names the product being removed.

Changing payment and shipping
Change the payment method
To change the payment method, visit My Account > Manage Subscriptions, select "Make Changes" on the Scheduled Order and select "Change" next to the payment method, or select "Update Payment". Select an existing payment method and select "Apply", or select "Add New" and enter the card details. Select "Confirm" to save, or "Update and Process Now" to save and process the Scheduled Order immediately.