
Klaviyo
Klaviyo is a marketing automation platform that uses data about customers and their Scheduled Orders to drive marketing communications via email, text/SMS and push notifications that increase revenue.
When you integrate your QPilot Site(s) with Klaviyo, valuable customer and subscriber lifecycle data is sent to Klaviyo including Customer Lifetime Value, Number of Active Scheduled Orders, Last Paused Scheduled Order Date, and much more.
Learn more about our Klaviyo integration here!
Integration: Connecting Klaviyo to QPilot
To connect Klaviyo to QPilot, you should already have a Klaviyo account that is connected to your Shopping Cart, and the ability to access your Klaviyo account's settings.
- Login to your Klaviyo account (https://www.klaviyo.com/login)
- Navigate to the Integrations page (https://www.klaviyo.com/integrations)
- From the Integrations page, select Developers from the upper right menu, then "Developer Tools" and then select "Manage API Keys"
- From the "Manage API Keys" screen, select "Create Private API Key"
- Learn more about retrieving your Klayivo API credentials here.
- Create a new Private API Key by first giving it a name (like "QPilot Key") and then selecting the "Custom Key" option.
- Assign Full Access for at least these 2 API Scopes
- Events (Full Access)
- Profiles (Full Access)
- You can assign other API Scopes Full Access as well, but Events and Profiles must be Full access in order for the integration to work.
- Select the "Create" button to view your new Private Key
- Assign Full Access for at least these 2 API Scopes
- Copy your Private Key
- You will use this Private Key to connect Klaviyo to QPilot
- Login to your QPilot Merchant Center https://portal.qpilot.cloud/
- Navigate to your Apps Page
- From your QMC Dashboard, select your account menu (your profile name in the upper-right corner of the screen) and then select "Apps"
- On the Apps Page, scroll down to "Klaviyo" and select it
- Scroll to the section "Select Your QPilot Site to Connect" and then select your site from the dropdown menu
- Locate your Klaviyo Private API Key (copied in Step 6) and copy and paste it in the "Private API Key" field and then select the "Update" button.
Done! Now that your QPilot Site is connected to Klaviyo, QPilot will synchronize customer data and their subscriber metrics to Klaviyo.
To connect additional QPilot Sites to Klaviyo, simply repeat the process and select a different site when asked to "Select Your QPilot Site to Connect" (Step 10).
Allow 5-10 minutes for new site connections
When you first connect to Klaviyo, please allow a few minutes for data to begin synchronizing. Sites that are synchronizing data for more than 10,000 customers will require additional time (30-60 minutes) to completely synchronize all pre-existing customer data with Klaviyo.
Customers and Subscriber Metrics in Klaviyo
After connecting your QPilot Site to Klaviyo, go to Audience > Profiles in Klaviyo and open a profile. You will see new Custom properties for that Profile.
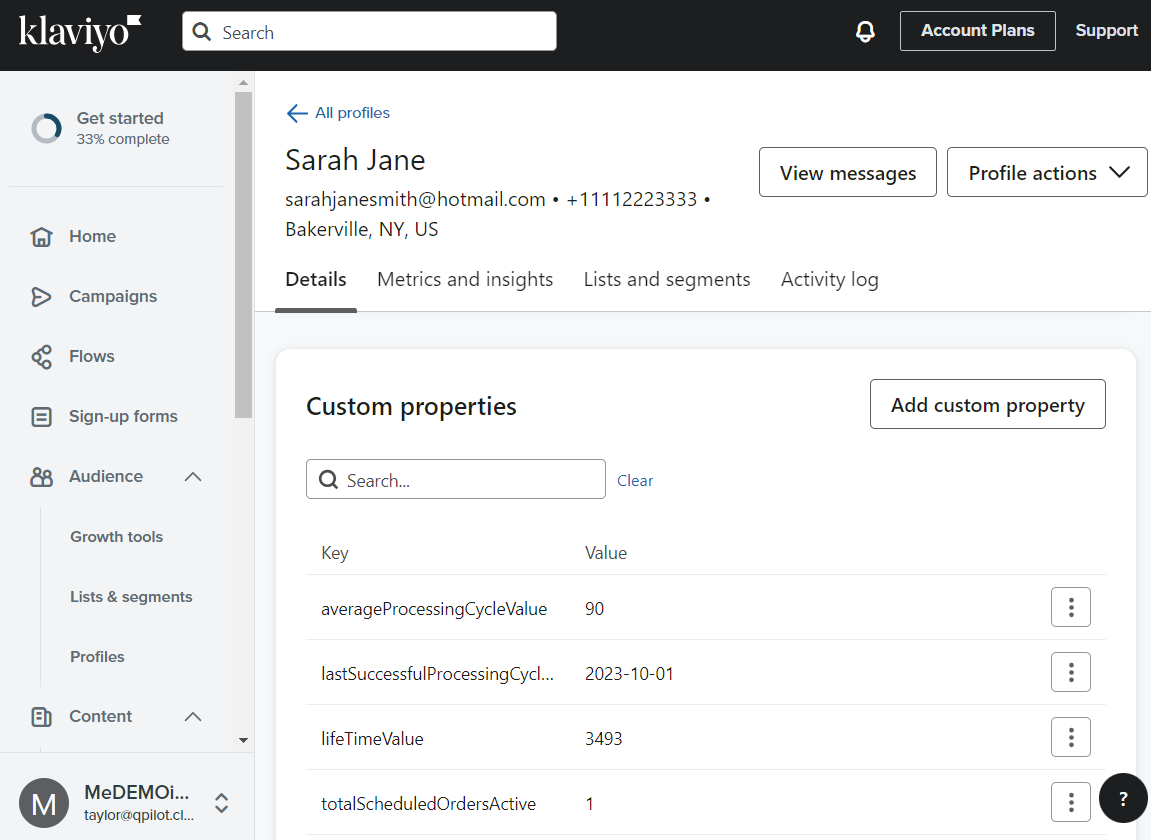
Example: Create a Segment for Customers that have reached their 6th successful Scheduled Order renewal
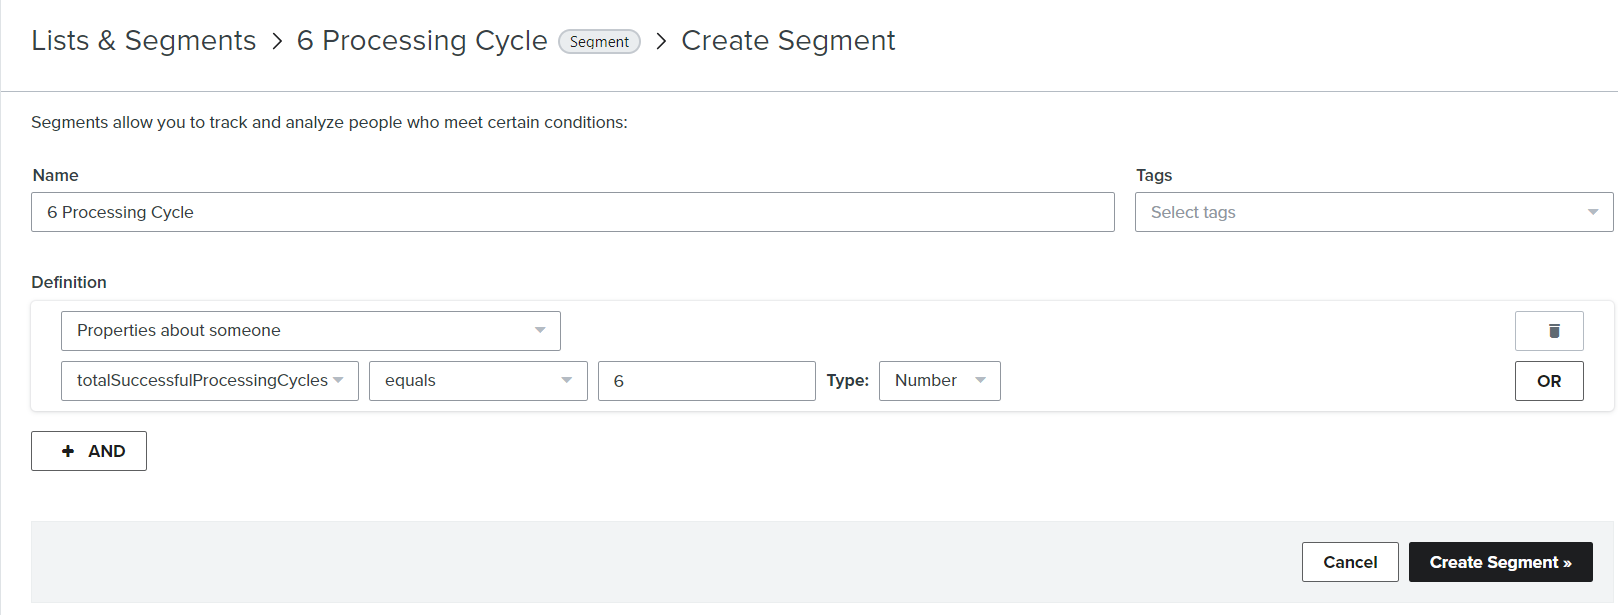
To create this segment, all you need is the custom property: TotalSuccessfulProcessingCycles
In Klaviyo, go to Audience > Lists & Segments. Select "Create" in the upper right and choose "Segment". Give your new Segment a title — something like "6 Processing Cycle" will work.
Now, add values for this Segment's Definition:
- For the Definition, select "Properties about someone"
- Dimension: TotalSuccessfulProcessingCycles
- Select "equals" and then add the value "6"
- Type: select "Number" from the dropdown
Create your new Segment!
👍 Add more Dimensions to this segment...
Reward high-value