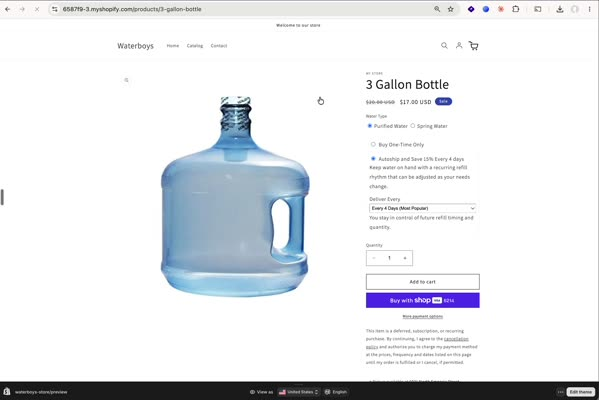
Add Subscribe & Save Options to Your Shopify Product Page
Show your customers a "Subscribe & Save" option alongside a one-time purchase on your product page by adding the Autoship Cloud app block — then load it with Liquid so it appears instantly.
Pre-Requisite Settings
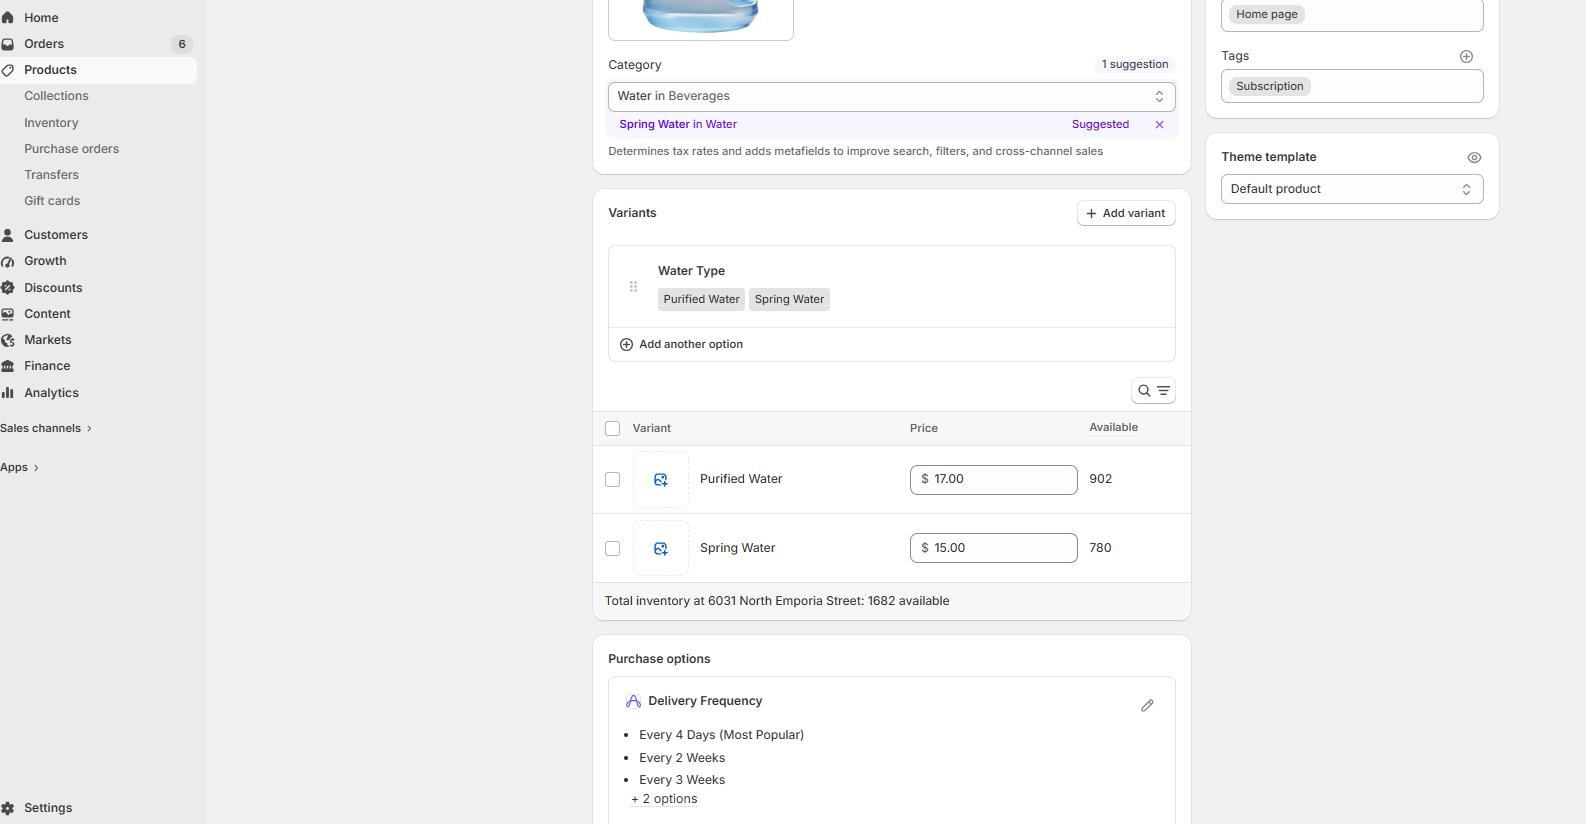
Your product needs purchase options (selling plans) turned on before the app block can display anything. To confirm selling plans are enabled:
- In your Shopify admin, open the product you want to show subscription options on your product page.
- Look at the product's variant and confirm Purchase options shows an Autoship subscription option.
- To double-check, open a variant and make sure the Autoship subscription options are listed there.
- Add selling plans if needed (learn more here).
Step 1 — Open your product page template
- Go to Online Store and open the theme that runs your product pages.
- Find the product page template assigned to your products. The easiest way: view a product on your live store, then choose to edit that template — or open the theme editor and select the product template directly.
Step 2 — Add the Autoship Cloud Widget
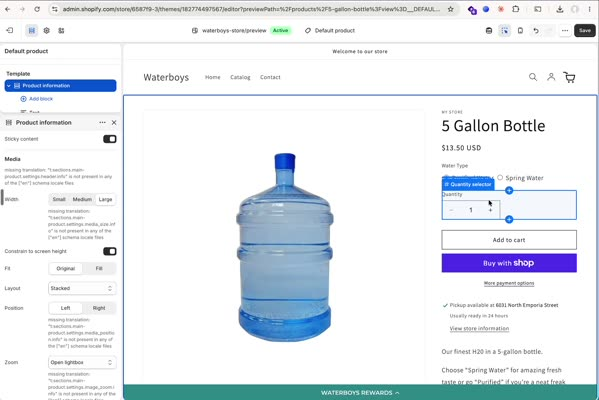
- In the theme editor, click the area of the product page where you want the options to appear.
- On the left, click Add block.
- Choose Apps, then select the Autoship Cloud Widget.
- The widget appears on the page. Grab it and drag it into place — just above the quantity selector is the most common spot for it so customers see the options before adding to cart.
Step 3 — Customize the text (optional)
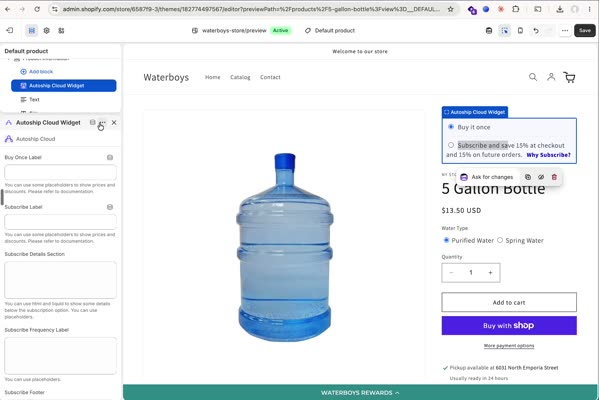
With the block selected, you can edit what it says on the left-hand panel:
- One-time purchase label — e.g. change it to "Buy one time only."
- Subscribe label — use dynamic fields so the customer's selected frequency shows in the text, e.g. "Autoship and save {discount} every {frequency}." The preview updates as you change the frequency.
- Customize the Subscribe Frequency Label or share more about subscription benefits in the Subscribe Details Section.
- Select subscription by default — when enabled, the subscription option is pre-selected when the page loads.
- CSS styling, if you want to match your theme.
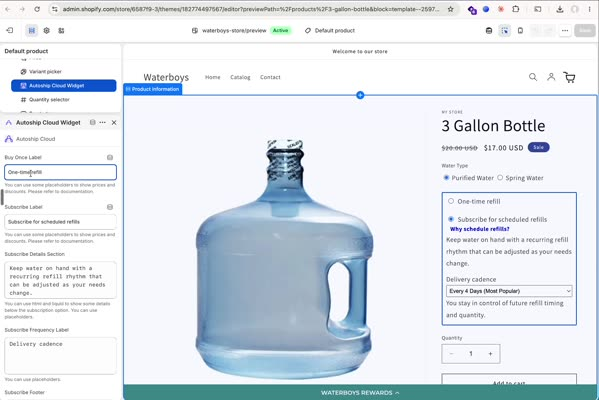
When you're happy with how the product page looks, click Save and check out how the widget looks on your product page live!
Step 4 — Load the Widget with Liquid (recommended)
Loading the block with Liquid makes it appear almost instantly and avoids conflicts with your theme's JavaScript. To switch:
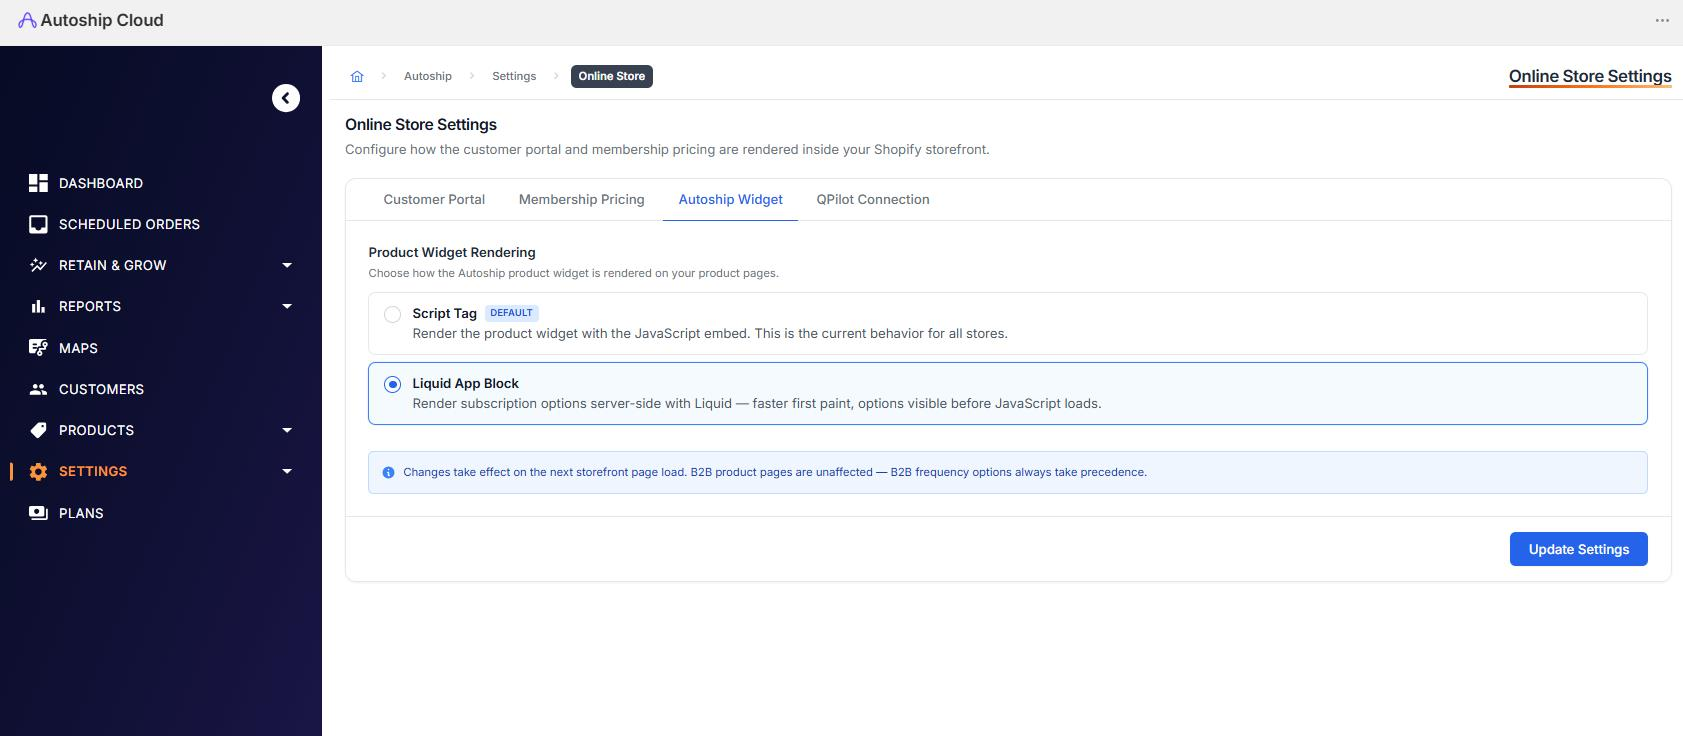
- Open the Autoship Cloud app and go to Settings.
- Click Online store.
- Find Autoship widgets. The product widget is set to Script tag by default.
- Change it to the Liquid app block and click Update Settings.
Step 5 — Confirm Autoship Options are Displaying
- Back in the theme editor, open a product and confirm the widget is still showing where you placed it.
- Then open the live product page and reload. The options should appear right away.